

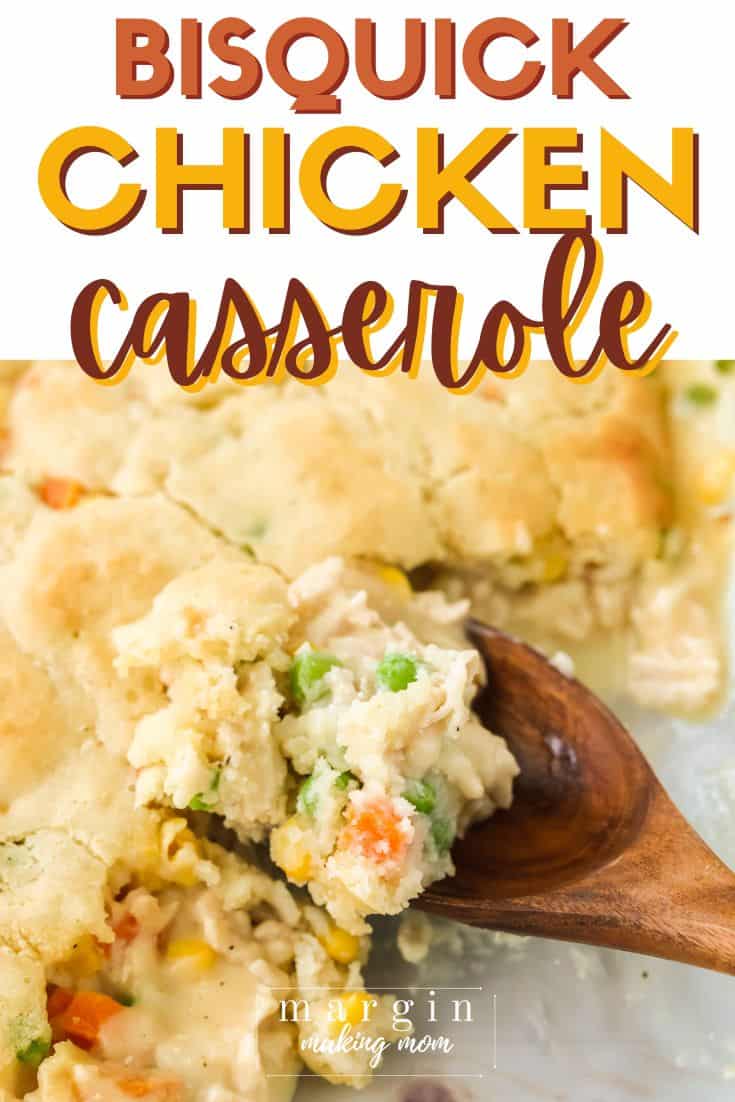
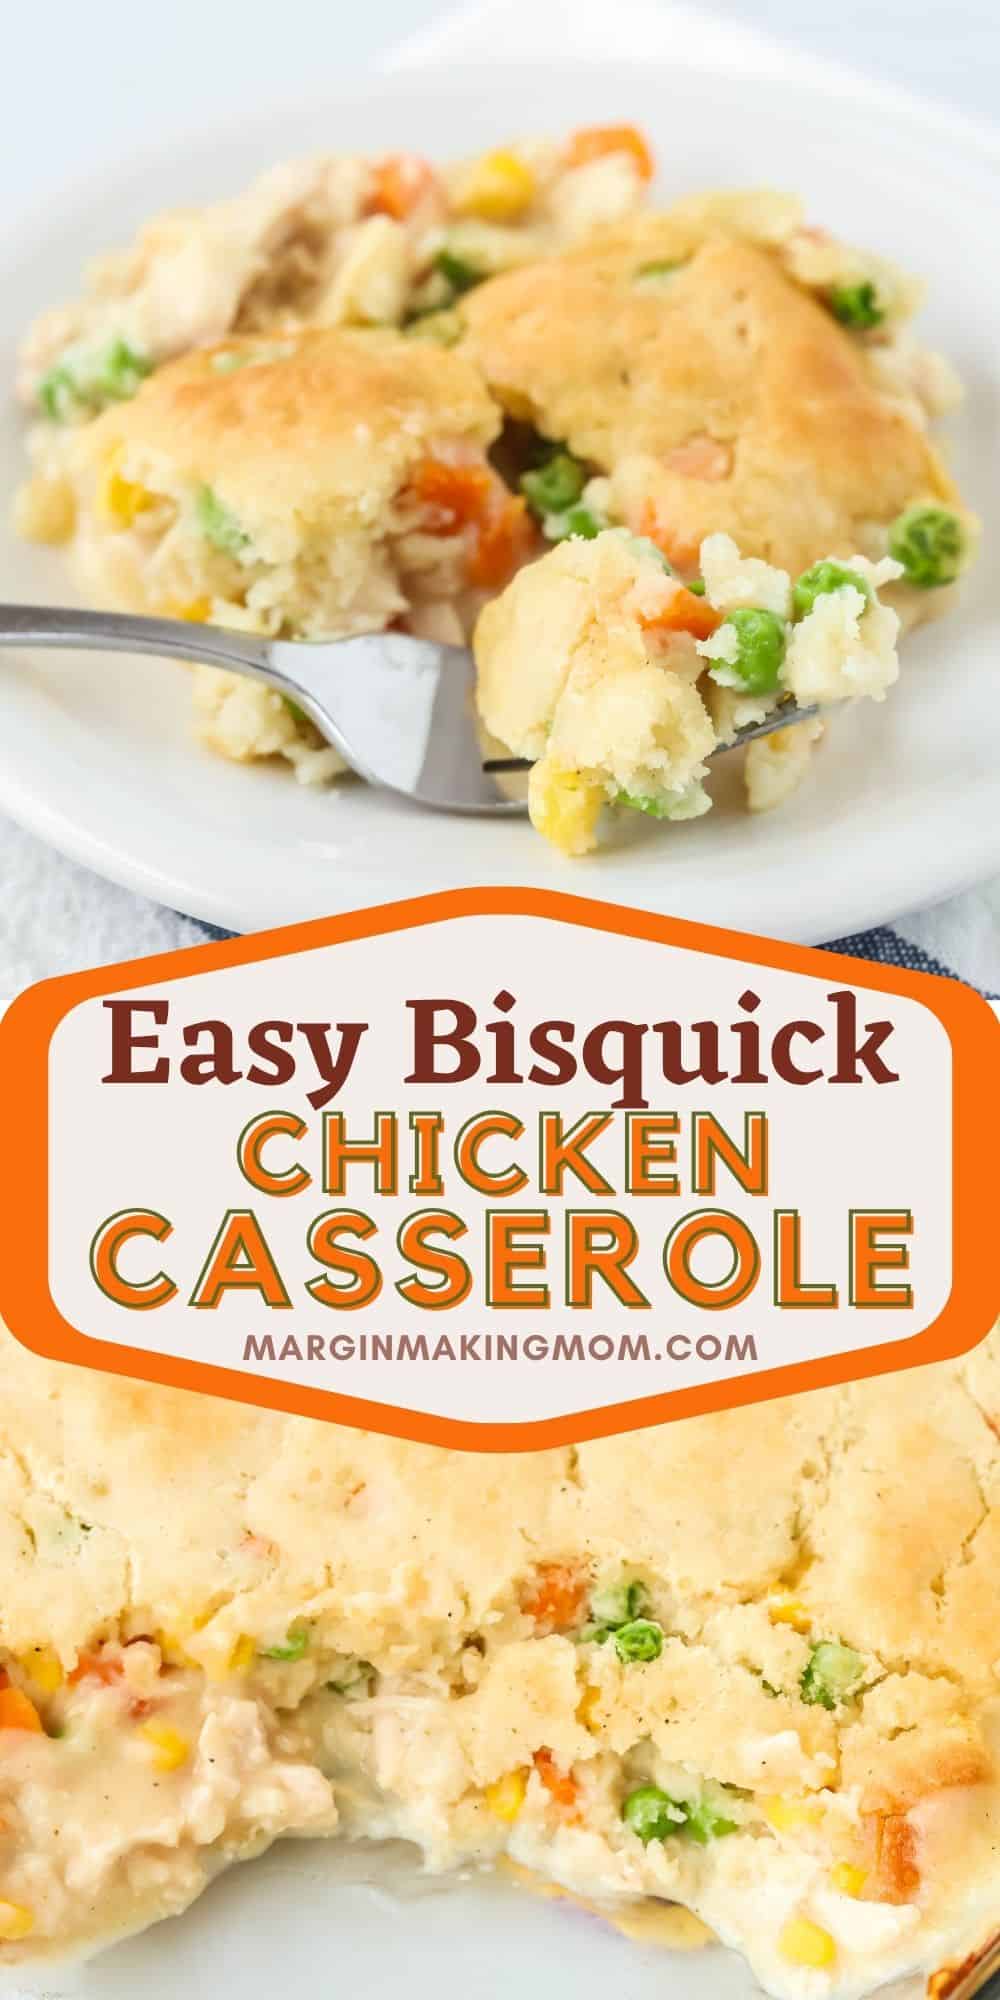
Easy Bisquick Chicken Casserole
This Easy Chicken Dinner with Bisquick is a quick way to enjoy a hearty, comforting meal with minimal prep and simple ingredients.
Easy-to-make Bisquick Chicken Casserole brings together tender chicken, hearty vegetables, and a fluffy biscuit-like topping for a satisfying meal.
Note: This post may contain affiliate links for your convenience. If you make a purchase, this site may receive a small commission at no additional cost to you. You can read my full disclosure policy here.
I absolutely adore chicken casserole recipes and almost any dish made with Bisquick.
Over the years, I’ve amassed quite a collection of these go-to comfort foods. They’re perfect for any time I need something simple yet satisfying!
When it comes to simplicity, this Bisquick chicken casserole is one of those delightful dishes that checks all the boxes.
With just a few minutes of prep, I can pop it in the oven and have time to relax (or fold laundry, ha!).
One thing that makes this Bisquick chicken bake especially fun is the magic that happens in the oven.
You pour the liquid over the Bisquick mixture, and like magic, the biscuit layer rises to the top during baking.
Another great thing about this easy chicken casserole is that it uses ingredients I always have on hand.
Chicken, frozen veggies, Bisquick mix, and some pantry staples come together to create a quick but homemade meal.
This casserole isn’t just for weeknights, though. It’s also a fantastic choice for Sunday dinners with the family.
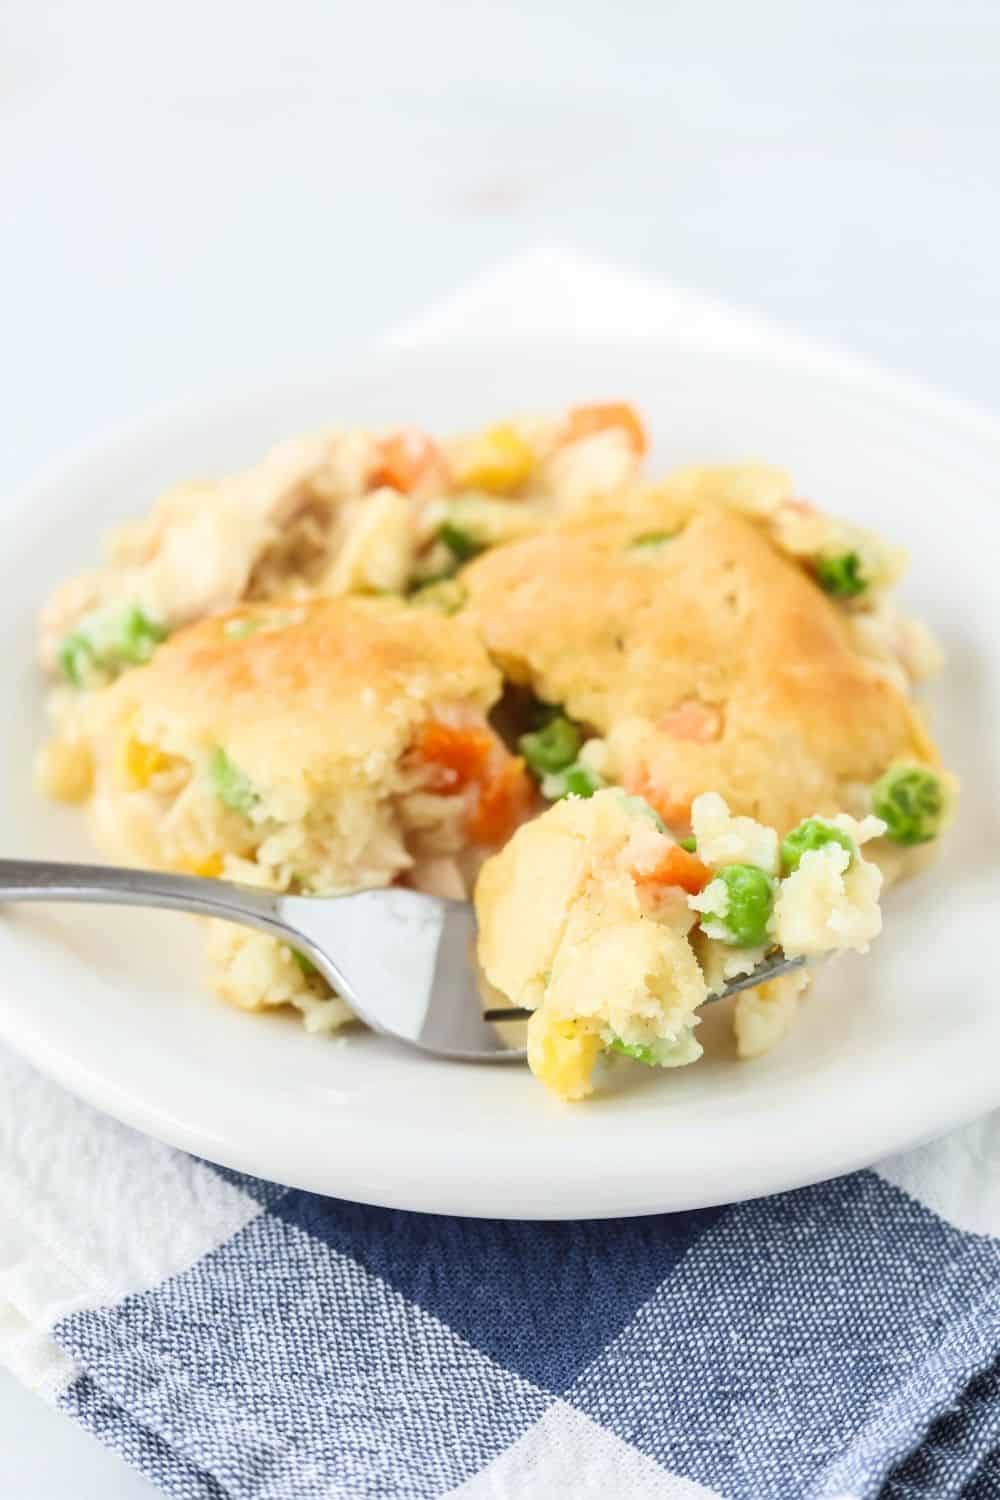
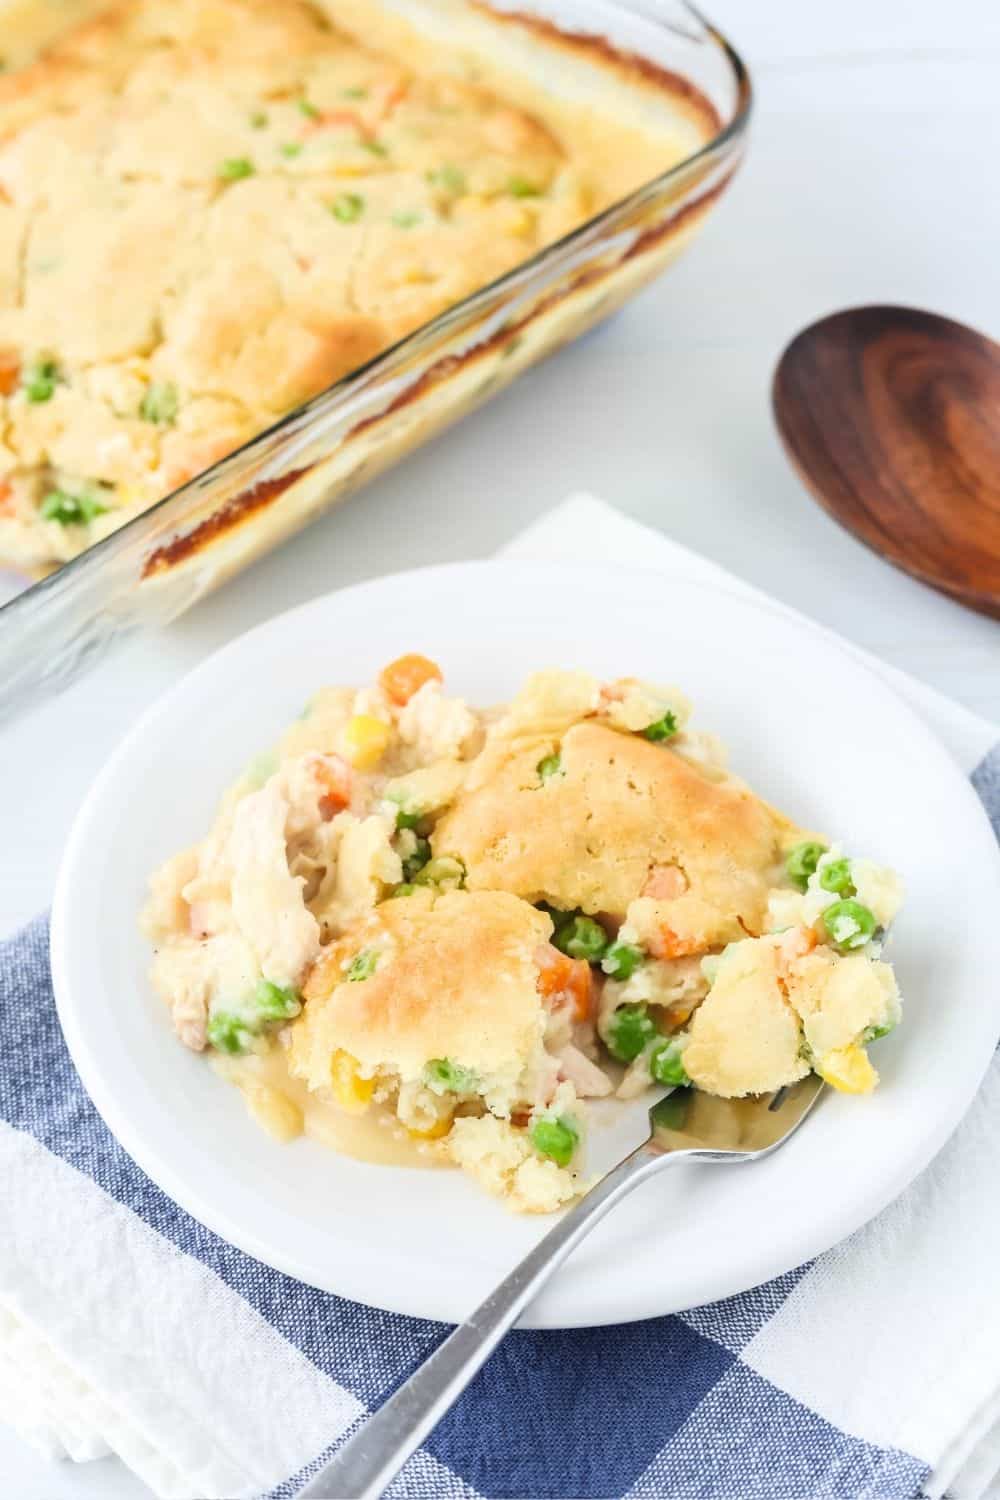
The rich, creamy filling and the fluffy biscuit topping make it a dish that everyone loves.
More Chicken Casserole Recipes:
- Oven Baked Chicken and Dumplings Casserole
- Easy Chicken Cobbler
- Chicken Hash Brown Casserole
- Creamy Instant Pot Chicken and Rice
- Chicken and Stuffing Casserole

Tips for Making this Bisquick Chicken Cobbler
- Using pre-cooked chicken saves time! You can use rotisserie chicken, leftover cooked chicken, or even quickly sauté some chicken breasts or thighs before starting the casserole. Canned chicken is also a great pantry-friendly option you can use in a pinch!
- Keep your pantry stocked with Bisquick. It’s one of my favorite kitchen staples to use in this recipe or other Bisquick recipe favorites like Bisquick chicken tenders, Bisquick Chicken Pot Pie or Chicken and Bisquick Dumplings.
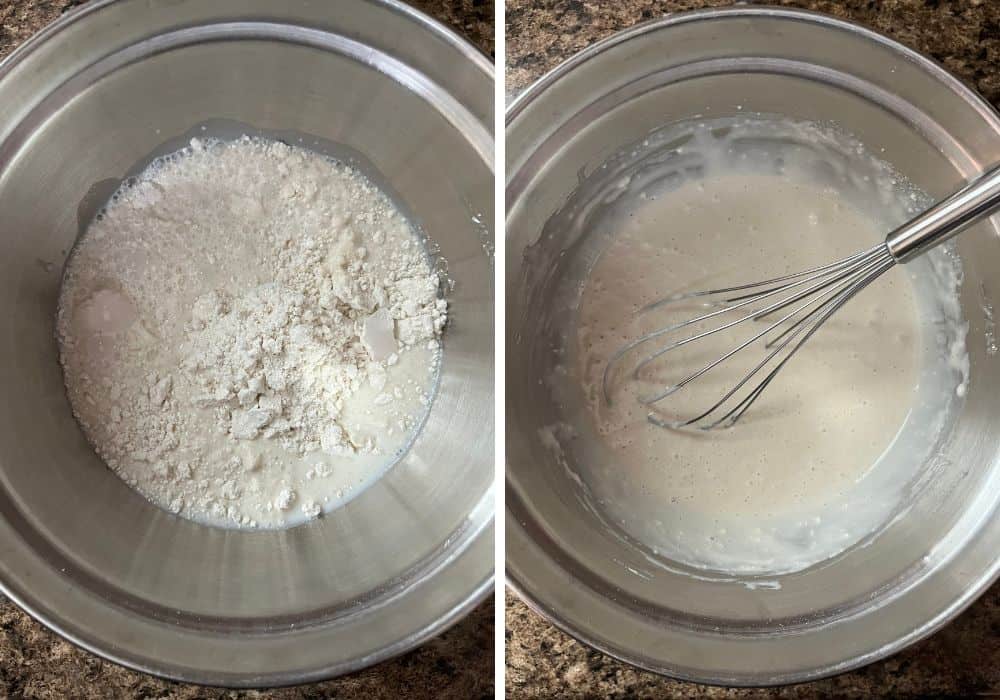
- Whisk the Bisquick baking mix and milk until smooth to avoid lumps in your biscuit layer. A well-mixed batter will rise evenly and create a nice, fluffy topping.
- Resist the temptation to stir after adding the Bisquick batter and the broth mixture. Letting the layers stay as they are helps the biscuit topping rise to the top during baking, creating that wonderful layered effect.
- I prefer to use homemade cream of chicken soup, but store-bought condensed cream of chicken soup is a convenient substitute.
- Allow the casserole to cool for a bit after baking. This helps the sauce thicken and makes it easier to serve. Don’t worry if it looks a bit runny when it first comes out of the oven; it will set as it cools.
How to Make Bisquick Chicken Casserole
It’s really easy to make this chicken casserole with Bisquick.
Ingredients You’ll Need:
- Unsalted Butter
- Bisquick Baking Mix
- Milk
- Shredded/Chopped Cooked Chicken
- Frozen Vegetables (Peas, Carrots, and Corn)
- Chicken Broth
- Homemade Cream of Chicken Soup (or Condensed Cream of Chicken Soup)

How to Make It:
(Full printable recipe is available below)
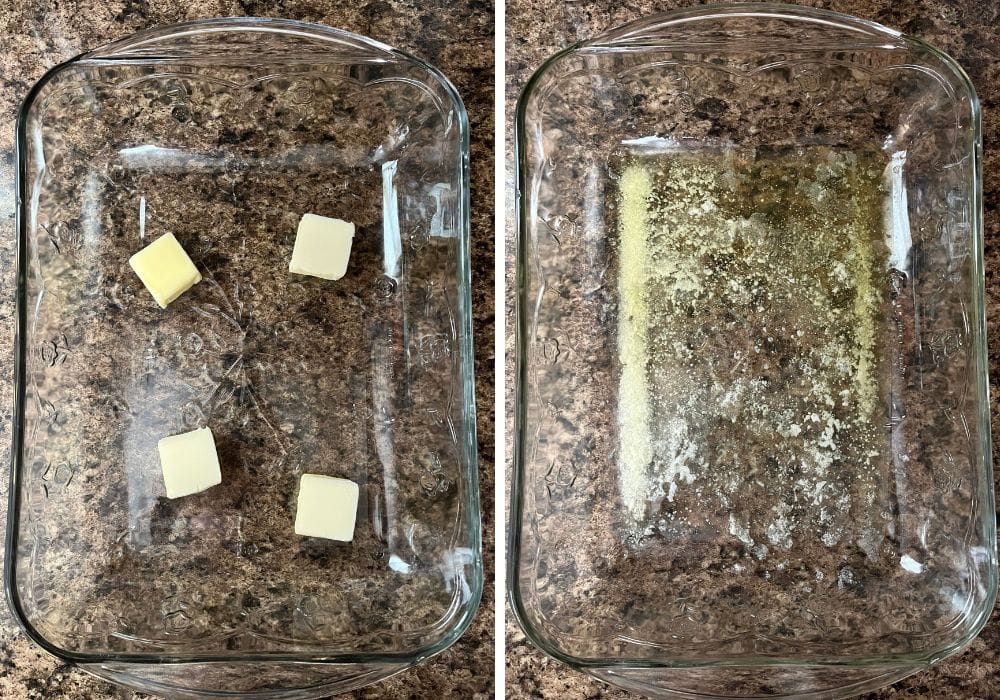
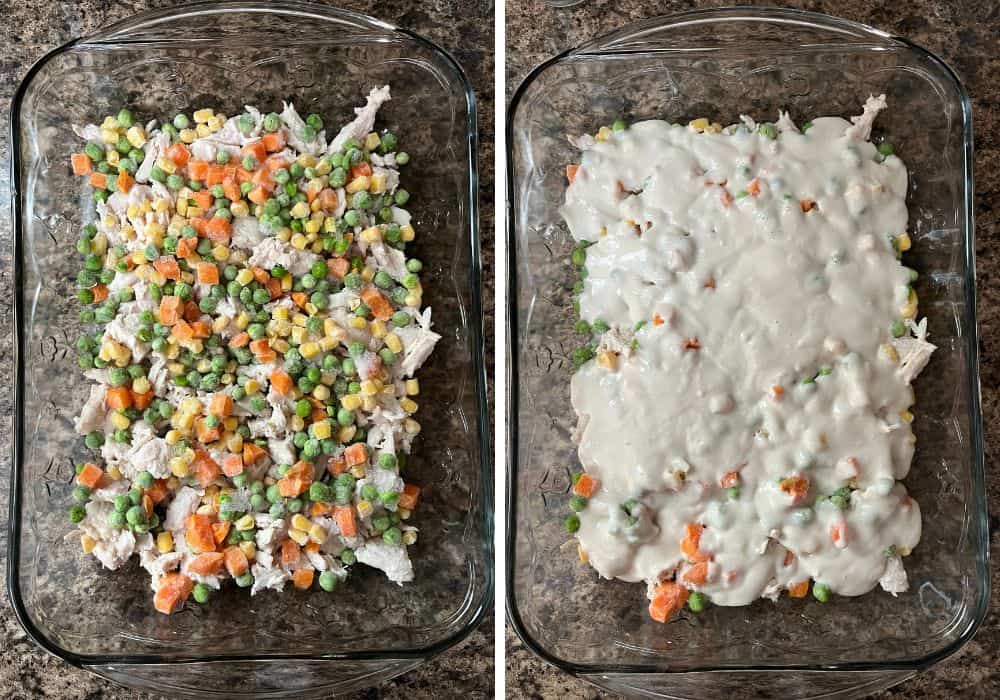
Melt the butter. First, you’ll preheat oven to 400F. Cut butter into four pieces and place in a 13×9″ baking dish.
Transfer dish to the oven to allow butter to melt while oven preheats.
Make the biscuit layer. Next, you’ll whisk together Bisquick baking mix and milk until smooth. Set aside.
Add chicken, veggies and Bisquick. Next, you’ll spread chicken pieces evenly over the melted butter, then sprinkle frozen veggies over the chicken pieces.
Pour the Bisquick batter evenly over the chicken and veggies, but don’t stir anything.
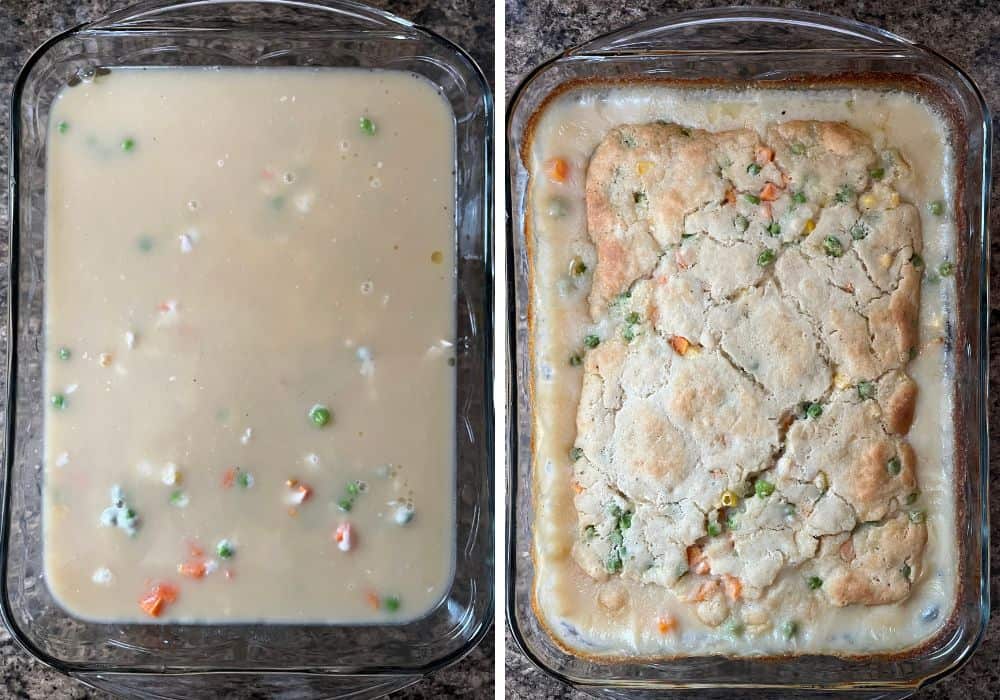
Add liquids and bake. Last, you’ll whisk together chicken broth and cream of chicken soup until well-combined.
Pour mixture evenly over the Bisquick batter, but don’t stir.
Carefully transfer dish to preheated oven (remember, the dish is still hot!) and bake for 45-50 minutes, or until bubbly and golden-brown on top.
Allow casserole to cool for about 15 minutes, which will allow the sauce to thicken up a bit.
Notes and Adaptations:
- Feel free to use whatever variety of frozen veggies you like!
- You can use 2 or 3 cups of chicken, depending on how much you have on hand or how hearty you want the casserole to be.
- The casserole may look a little runny when you first take it out of the oven, but that’s normal! The sauce will thicken as it cools.
Recommended Equipment:
Bisquick Chicken Casserole

This hearty and delicious Bisquick chicken casserole is the perfect comfort food for a busy weeknight! It comes together with minimal prep work, making an easy yet filling dinner.
Ingredients
- 1/4 cup unsalted butter
- 1 1/2 cups Bisquick baking mix
- 1 cup milk
- 2-3 cups shredded/chopped cooked chicken
- 1 1/2 cups frozen vegetables (I used peas, carrots, and corn)
- 1 3/4 cups chicken broth
- 1 cup homemade cream of chicken soup (or 10-oz can condensed cream of chicken soup)
Instructions
- Preheat oven to 400F. Cut butter into four pieces and place in a 13x9" baking dish. Transfer dish to the oven to allow butter to melt while oven preheats.
- Meanwhile, in a small mixing bowl, whisk together Bisquick baking mix and milk until smooth. Set aside.
- Once butter is melted, remove dish from oven. Tilt dish to allow butter to coat the bottom of the dish.
- Spread chicken pieces evenly over the butter, then sprinkle frozen veggies over the chicken pieces.
- Pour the Bisquick batter evenly over the chicken and veggies. Do not stir.
- In a separate bowl, whisk together chicken broth and cream of chicken soup until well-combined. Pour mixture evenly over the Bisquick batter. Do not stir.
- Carefully transfer dish to preheated oven (remember, the dish is still hot!) and bake for 45-50 minutes, or until bubbly and golden-brown on top.
- Remove dish from oven. Allow casserole to cool for about 15 minutes, which will allow the sauce to thicken. Serve and enjoy!
Notes
- Feel free to use whatever variety of frozen veggies you like!
- You can use 2 or 3 cups of chicken, depending on how much you have on hand or how hearty you want the casserole to be.
- I prefer to use homemade cream of chicken soup, because it's easy and flavorful. But you can use condensed, canned cream of chicken if you prefer.
- The casserole may look a little runny when you first take it out of the oven, but that's normal! The sauce will thicken as it cools.
Recommended Products
As an Amazon Associate and member of other affiliate programs, I earn from qualifying purchases.

Nutrition Information:
Yield:
6Serving Size:
1Amount Per Serving: Calories: 582Total Fat: 33gSaturated Fat: 12gTrans Fat: 0gUnsaturated Fat: 18gCholesterol: 156mgSodium: 1052mgCarbohydrates: 30gFiber: 3gSugar: 8gProtein: 39g
Nutrition information is automatically calculated and is not guaranteed for accuracy.
Be sure to save this recipe to your dinner ideas board on Pinterest!


This was a hit with my family last night. I did add garlic powder, s&p to my bisquick mix and cheese on top.
Thank you so much! I’m glad to hear it was a hit–your tweaks sound delicious, too! 🙂