

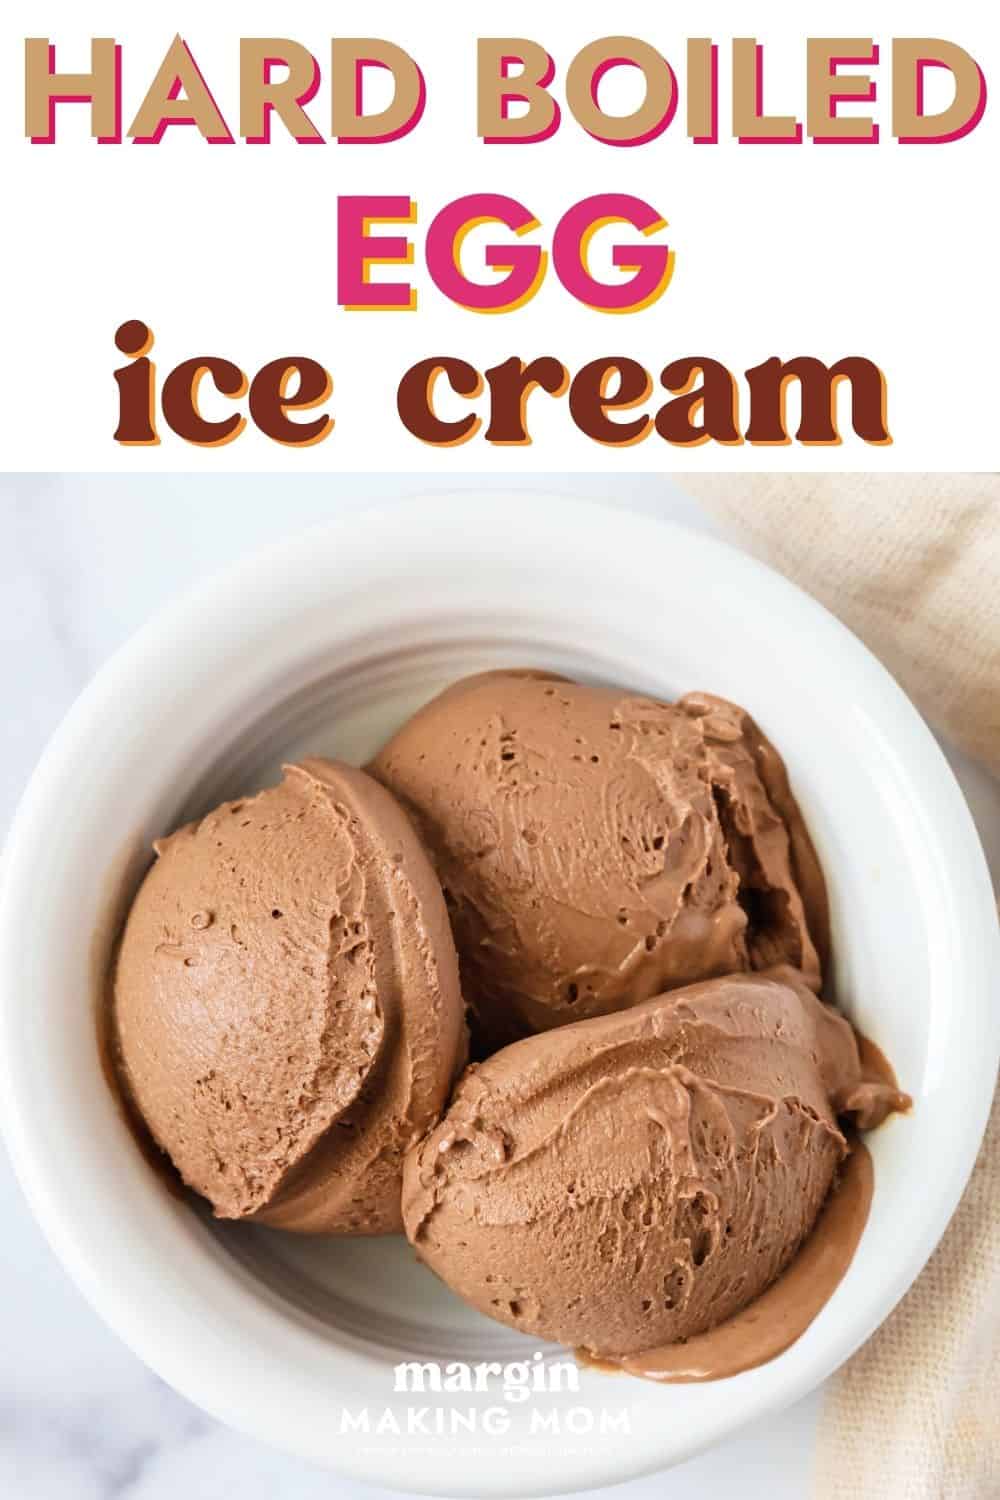
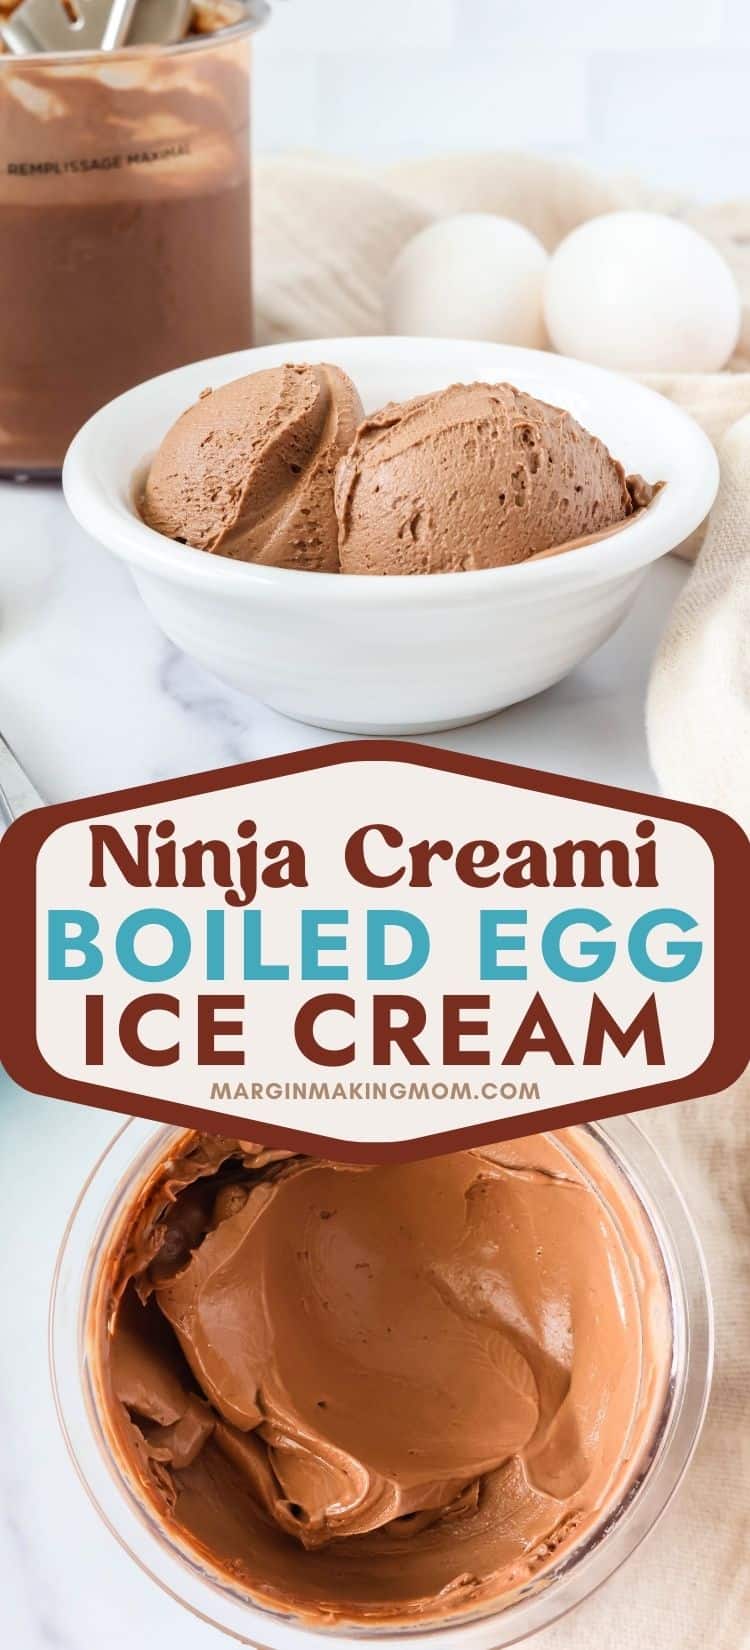
Easy Hard-Boiled Egg Ice Cream (Ninja Creami or Ice Cream Machine)
Transform hard-boiled eggs into a rich, silky smooth chocolate ice cream with your Ninja Creami or traditional ice cream machine.
Nobody will ever guess what’s in this hard-boiled egg ice cream! It’s chocolatey, decadent, and high protein, making it a delicious treat you can feel good about.
Note: This post may contain affiliate links for your convenience. If you make a purchase, this site may receive a small commission at no additional cost to you. You can read my full disclosure policy here.
Every Easter, we inevitably end up with a bunch of leftover hard-boiled eggs that were dyed in a variety of colors.
And although I love a good egg salad sandwich, I don’t want to be eating it for days on end!
I recently saw a recipe for hard boiled egg pudding, and it gave me the idea to do something similar and make some ice cream.
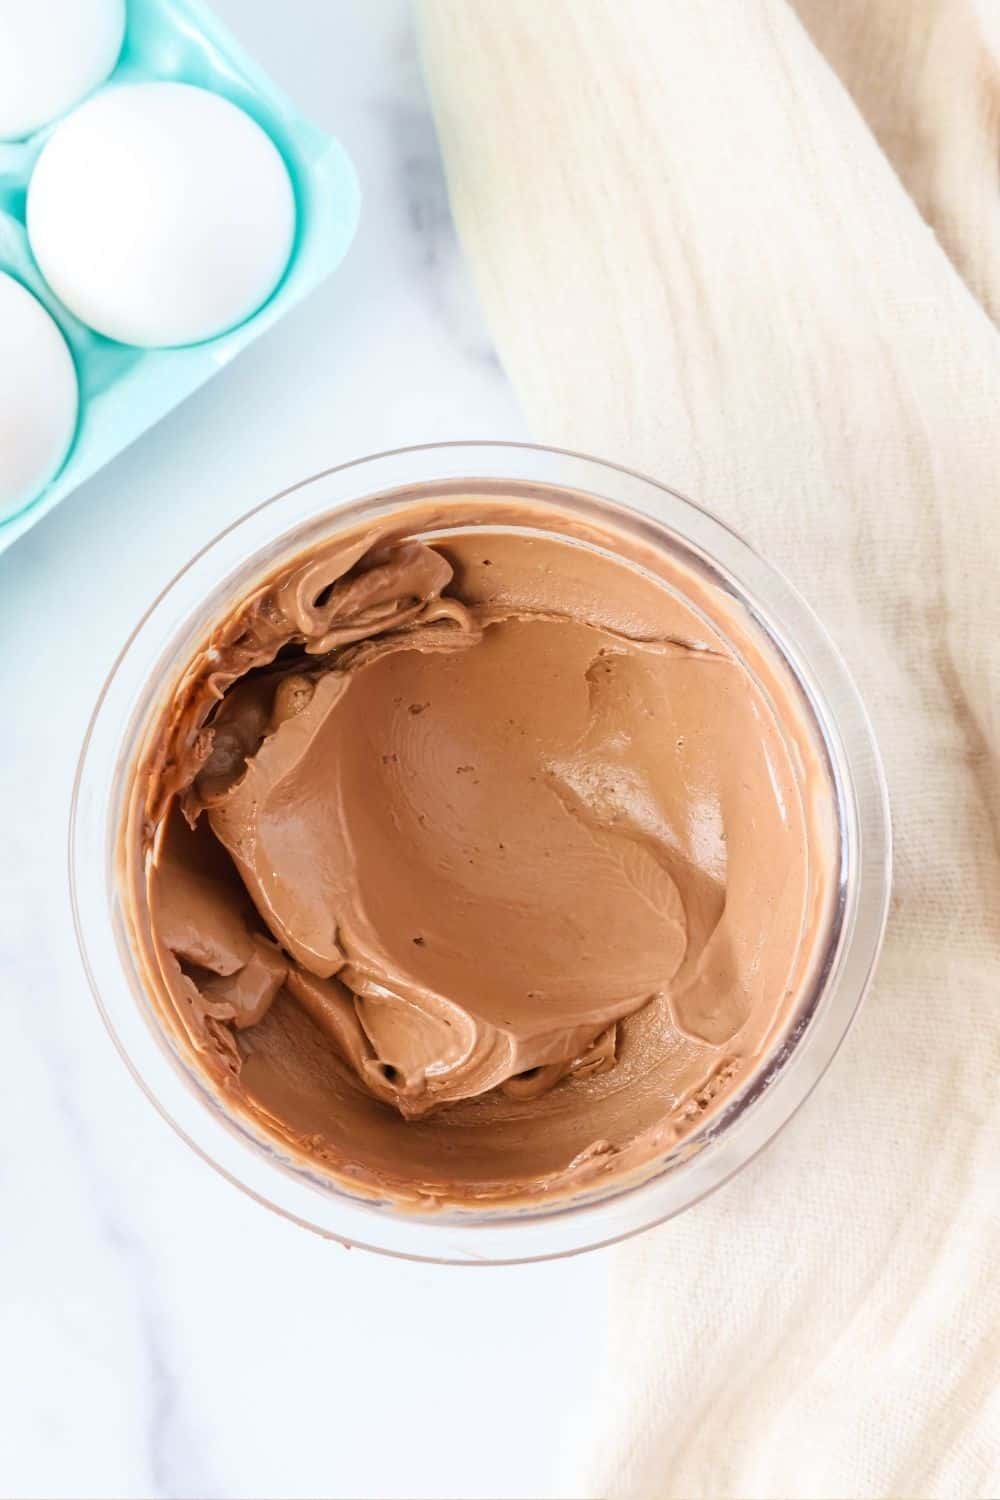
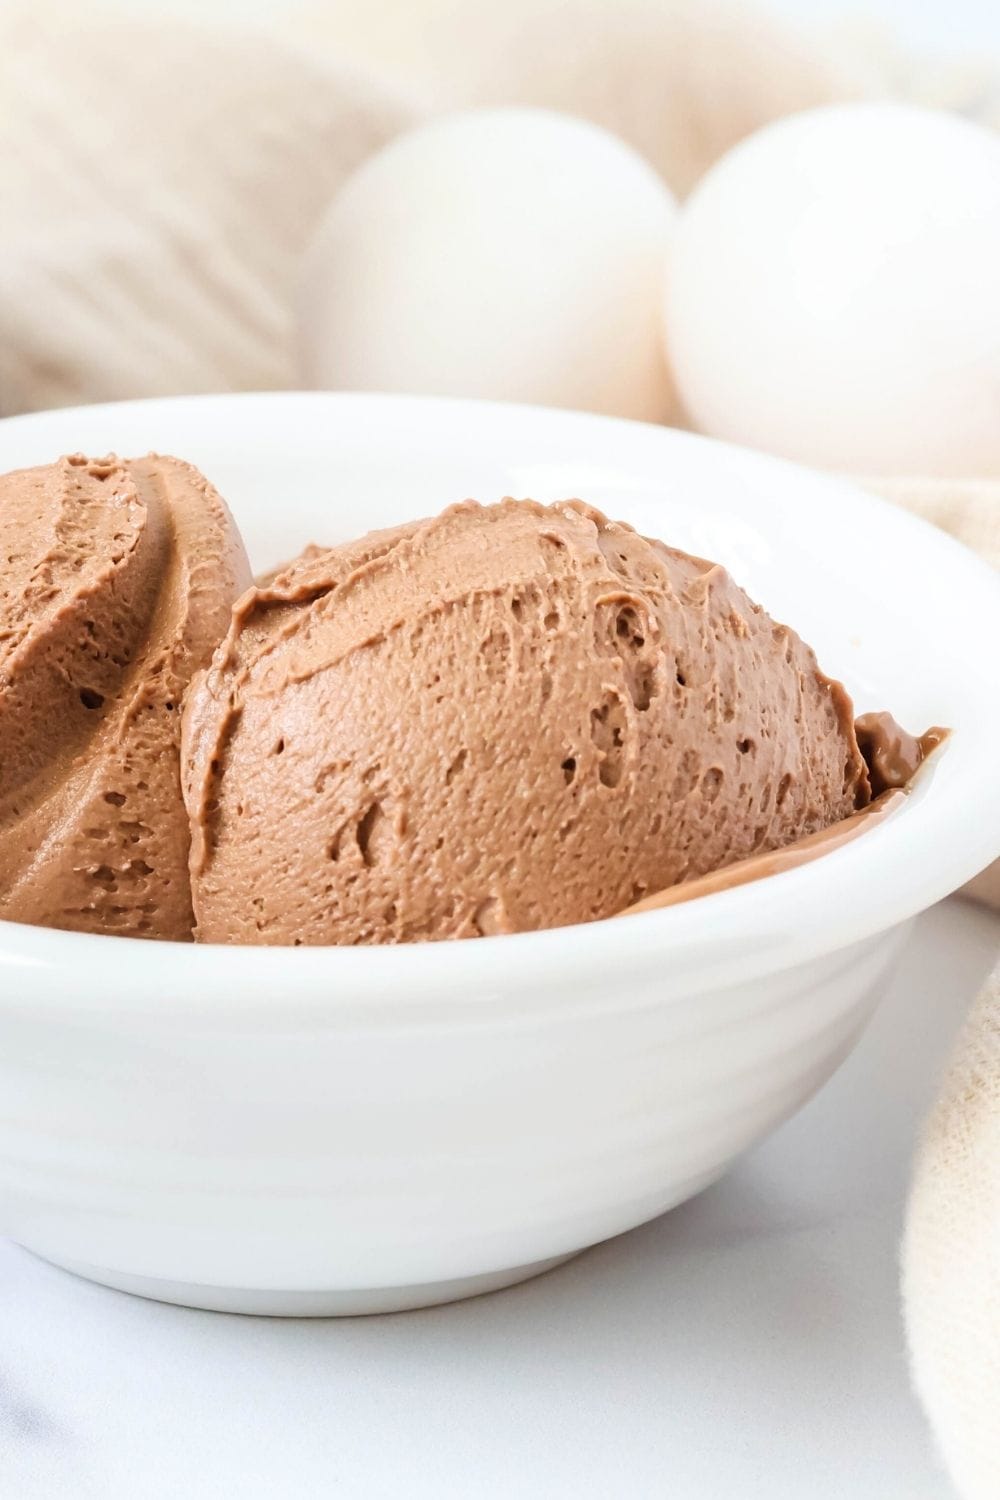
The result was an incredibly smooth, silky hard boiled egg ice cream, in a rich chocolatey flavor. You can’t even taste the eggs!
Just to be sure, I had my husband taste it. I didn’t tell him beforehand what was in the ice cream. He remarked on the silky smooth texture and the deep flavor. When I told him it was made with hard-boiled eggs, he couldn’t believe it!
I made mine in the Ninja Creami machine, but I’m including instructions for making it in a traditional ice cream maker as well.
If you have leftover boiled eggs laying around, or if you just want a high protein dessert, give this ice cream a try!
Tips for Making Ice Cream with Boiled Eggs
I prefer to cook hard-boiled eggs in the Instant Pot, because they are SO much easier to peel than eggs that are boiled on the stove top. But you can cook them with whatever method you prefer.
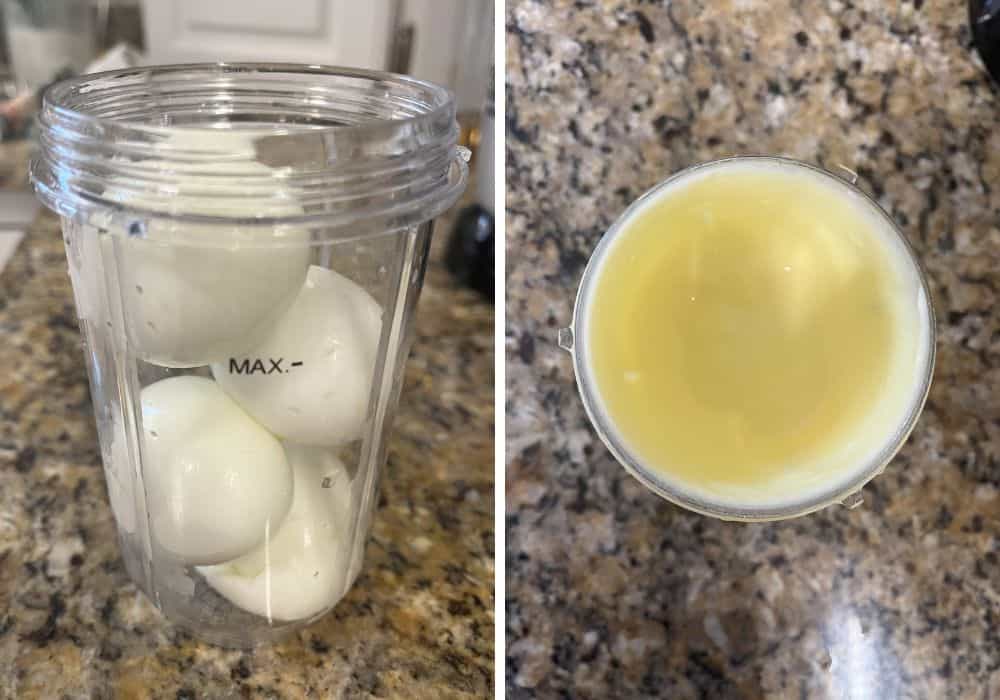
You’ll be using the whole eggs (peeled, of course), so you’ll need both the egg whites and yolks. The fat from the yolks gives it a nice creamy texture, and the whites provide the extra protein.
One of the most important things about this recipe is that you want to make sure to blend everything up nice and smooth, so you’ll definitely need a blender.
I used my Magic Bullet blender for the Ninja Creami version, and it was just barely big enough to hold the ingredients. If you’re making a larger amount of ice cream, you’ll definitely need a bigger blender.
In order to mask the egg flavor, cocoa powder and sugar are used, along with vanilla extract. I also added some caramel extract, which gave it an even deeper flavor.
I don’t think you could get away with making a vanilla variety, because vanilla on its own wouldn’t be strong enough to cover the egg flavor.
More Ice Cream Recipes to Check Out:
- 100+ Best Ninja Creami Recipes
- The Best No-Churn Ice Cream Recipes
- 20+ Must-Try High Protein Ninja Creami Recipes
How to Make Boiled Egg Chocolate Ice Cream
It’s really easy to make this high-protein dessert.
Ingredients You’ll Need
- Hard Boiled Eggs
- Milk
- Sugar
- Cocoa Powder
- Vanilla Extract
- Caramel Extract (optional)
- Salt
How to Make It:
Find the full printable recipe available below
Blend eggs and milk. First, you’ll combine the peeled eggs and milk in a blender. Pulse until the mixture is pale yellow and creamy.
Add remaining ingredients. Then, you’ll add the sugar, cocoa powder, vanilla extract, caramel extract (if using), and salt. Pulse the blender again until everything is combined and smooth.
You may need to scrape down the sides of the blender once or twice to ensure everything is combined well.
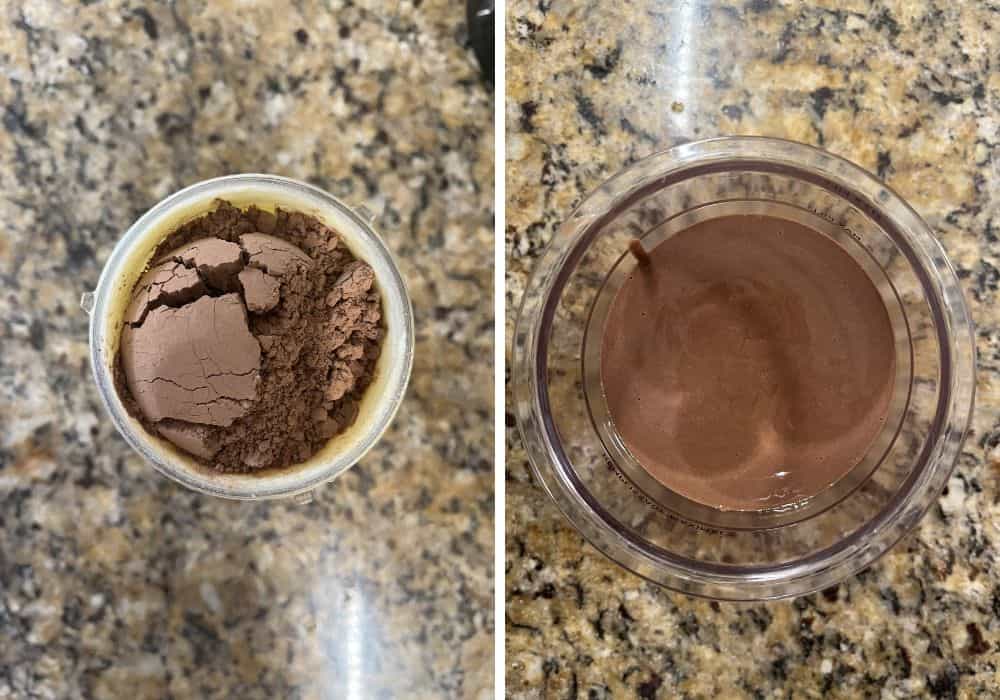
Freeze. If you’re using the Ninja Creami machine, you’ll pour the mixture into a pint container and close its lid. Freeze on a level surface for at least 24 hours.
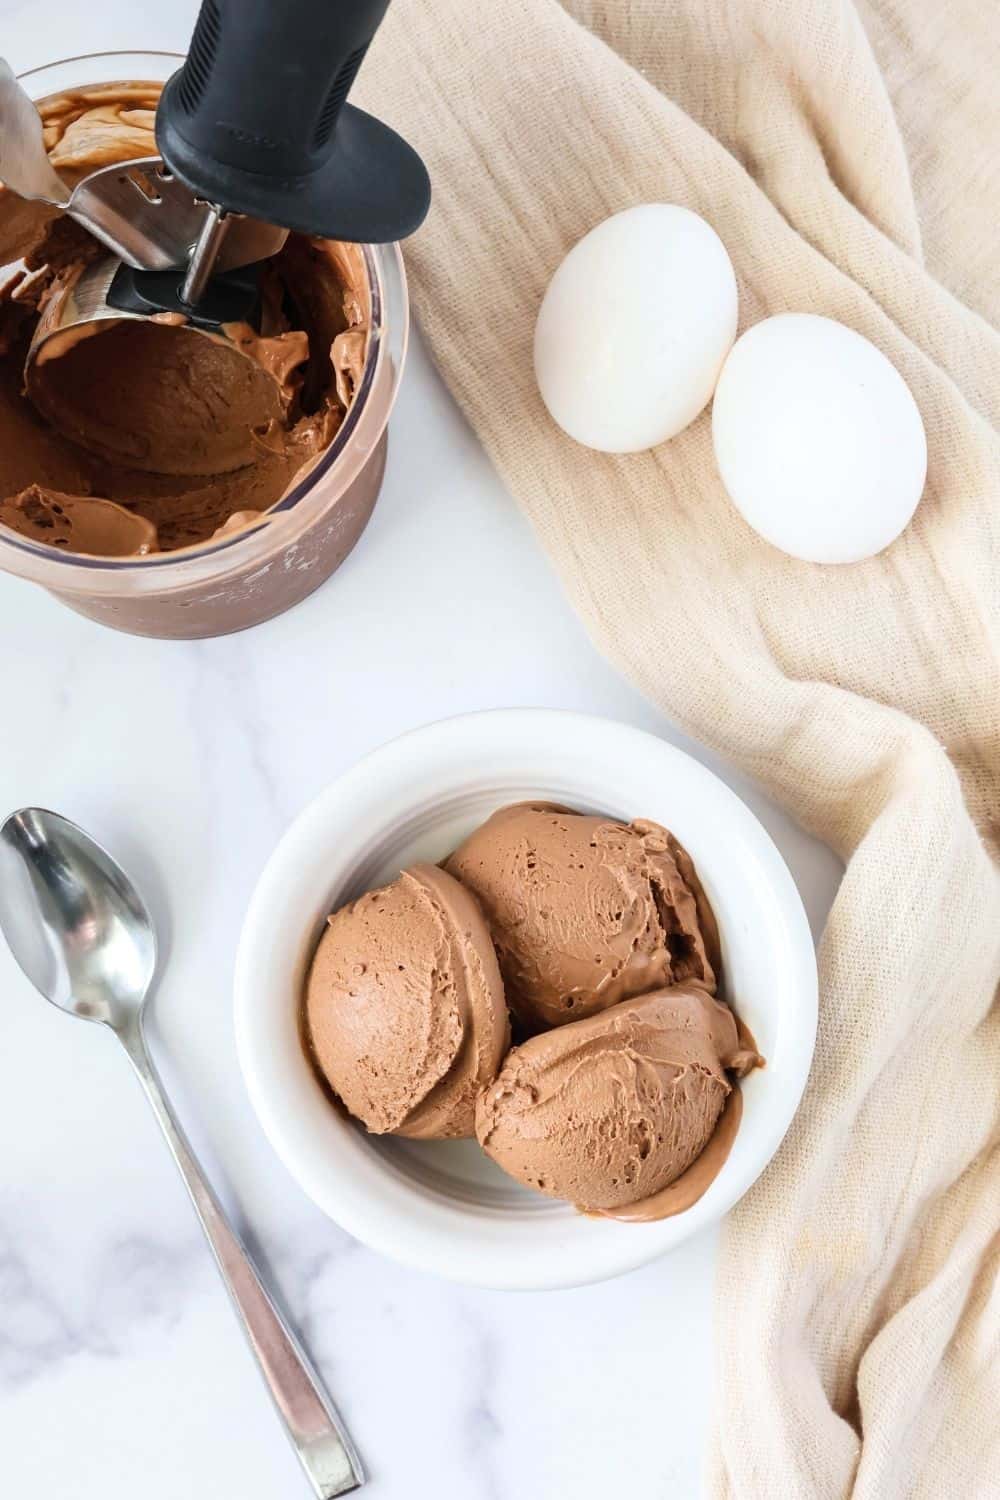
Spin. Place the frozen pint container into the outer bowl of the Ninja Creami and lock it into place. Press the Ice Cream button and allow the cycle to complete.
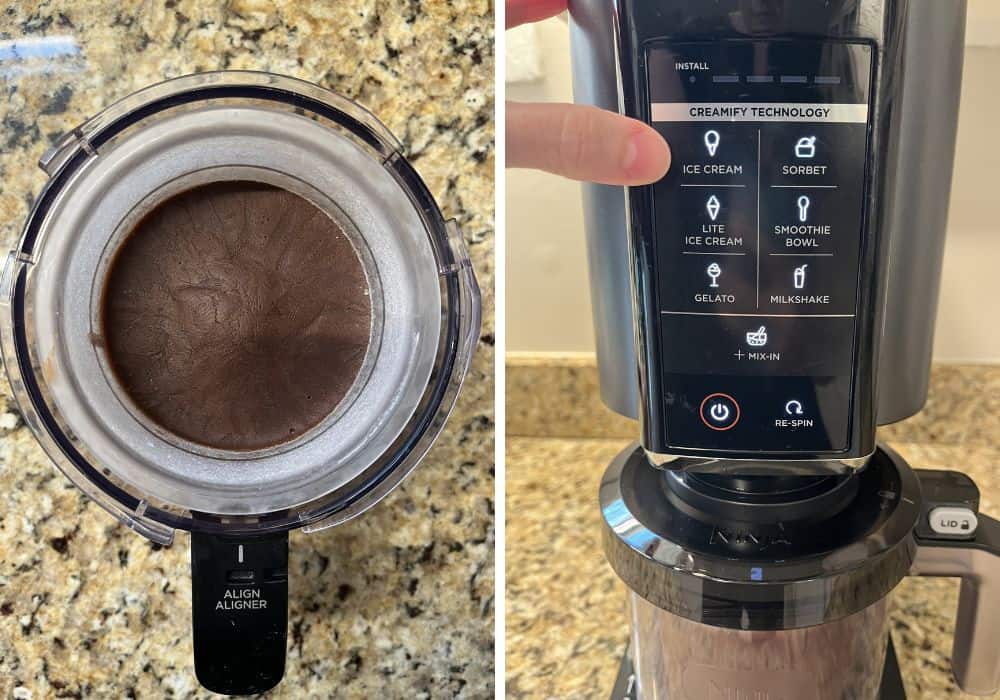
Remove the pint and check the ice cream’s texture. If it looks powdery or crumbly, place it back in the machine and use the Re-spin cycle.
If it’s still crumbly after that, add a tablespoon of milk and re-spin once more. When it’s ready, it will be smooth and creamy!

If you’re using a traditional ice cream maker, you’ll pour the liquid into the freezer bowl of your machine and allow the dasher to churn the ice cream until it’s soft serve consistency.
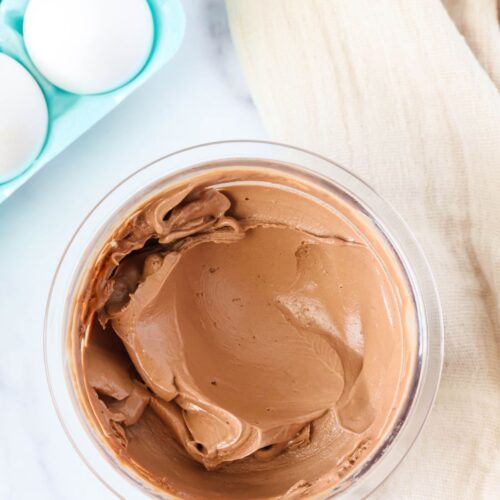
At that point, you can serve it or transfer it to a freezer-safe storage container and freeze for a few hours to firm it up to a scoopable consistency.
Notes and Adaptations:
- As written, this recipe will yield approximately 1 3/4 cups of liquid ice cream base. This is enough liquid to satisfy the minimum requirement for many traditional ice cream machines, but check your specific model to make sure it’s enough for the dasher to churn. You can double the recipe if needed, or if you prefer to make a larger amount of ice cream.
- If serving leftovers of ice cream made in the Ninja Creami, I recommend letting the pint container sit out at room temperature for 10-15 minutes to soften before scooping.

Recommended Equipment:
Hard Boiled Egg Ice Cream
Ingredients
- 4 hard boiled eggs (peeled)
- 1/2 cup milk
- 1/3 cup sugar
- 1/4 cup cocoa powder
- 1 1/2 teaspoon vanilla extract
- 1/4 teaspoon caramel extract (optional, but adds nice depth of flavor)
- 1 pinch salt
Instructions
- In a blender, combine eggs and milk. Blend until pale yellow and creamy.
- Add sugar, cocoa powder, vanilla extract, caramel extract (if using), and salt. Blend until mixture is smooth and all ingredients are incorporated, scraping down the sides of the blender jar as needed.
Ninja Creami Instructions:
- Pour mixture into a Ninja Creami pint container and close its lid. Transfer to a level surface in your freezer and let freeze for at least 24 hours.
- Remove pint from freezer, take off its lid, and place the container into the outer bowl of the Ninja Creami. Secure the outer bowl into the machine. Press the Ice Cream button and allow the cycle to complete.
- Remove the pint from the machine and check the ice cream's texture. If the ice cream is crumbly, place it back into the machine and press the Re-spin button. If it's still crumbly after that, add a tablespoon of milk and use the Re-spin cycle once more. It should be smooth and creamy when it's ready!
Ice Cream Maker Instructions:
- Ensure that your machine's freezer bowl has been in the freezer for at least 24 hours.
- Pour the mixture into your machine's freezer bowl while the dasher is in motion. Allow the dasher to churn and freeze the mixture until a soft-serve consistency is achieved (see notes below). This usually takes about 20-30 minutes.
Notes
- As written, this recipe will yield approximately 1 3/4 cups of liquid ice cream base. This is enough liquid to satisfy the minimum requirement for many traditional ice cream machines, but check your specific model to make sure it’s enough for the dasher to churn. You can double the recipe if needed, or if you prefer to make a larger amount of ice cream.
- Once the ice cream has reached soft serve consistency, it can be enjoyed at that stage or you can transfer it to an ice cream storage container and freeze it a few hours more to firm it up to a scoopable texture.
- If serving leftovers of the ice cream, I recommend letting the pint container sit out at room temperature for 10-15 minutes to soften before scooping.
Nutrition
Did you try this recipe?
Don’t forget to leave a rating below and make sure to follow on Instagram and Pinterest for more easy recipes!
Don’t forget to save this recipe to your ice cream board on Pinterest!


Easy family-friendly recipes in your inbox!