

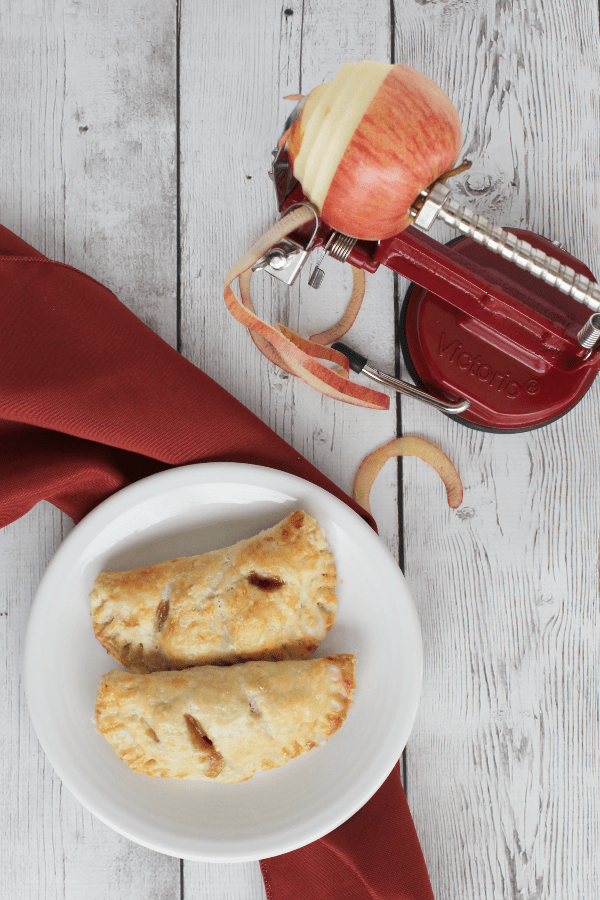
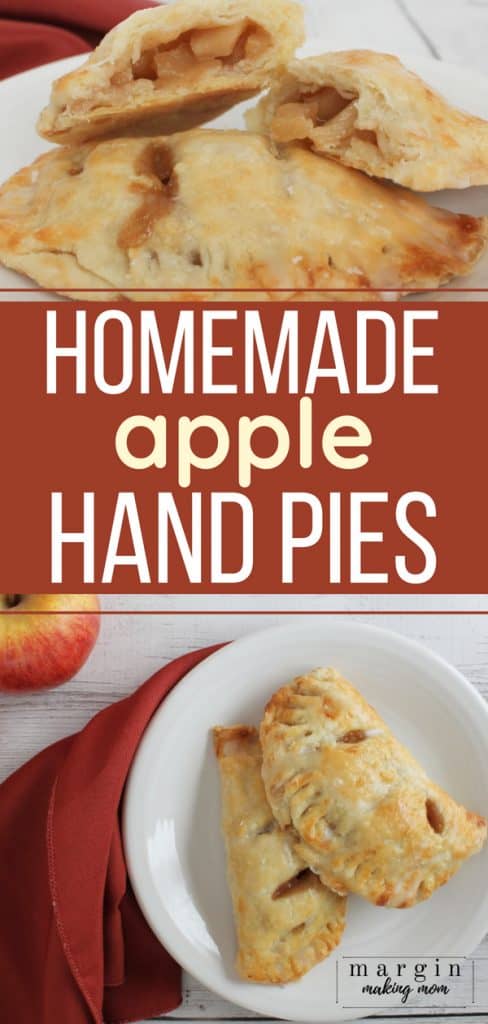
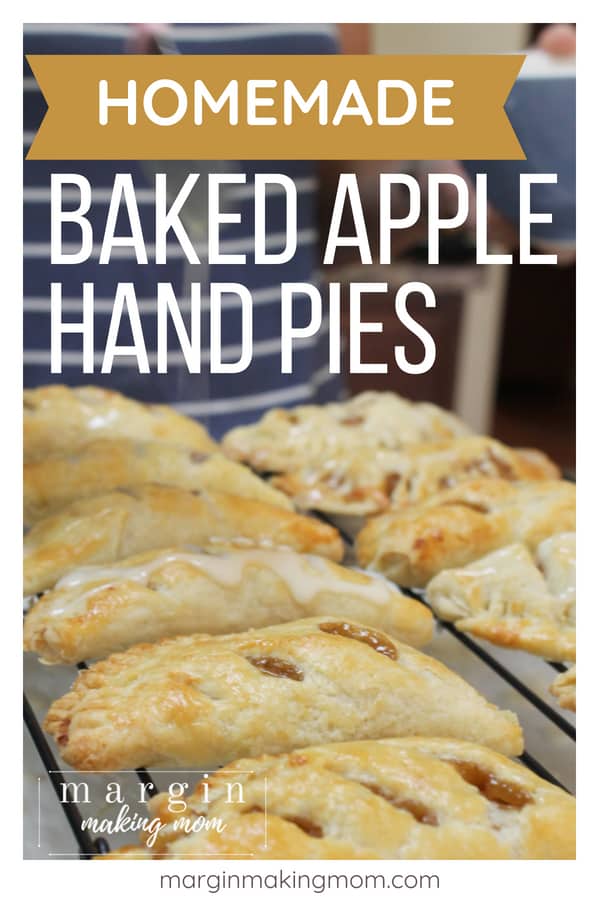
How to Make Easy Apple Hand Pies
Easy apple hand pies are a lovely fall dessert that will satisfy your need for brown sugar, cinnamon, and apples. Simple, yet so deliciously perfect!
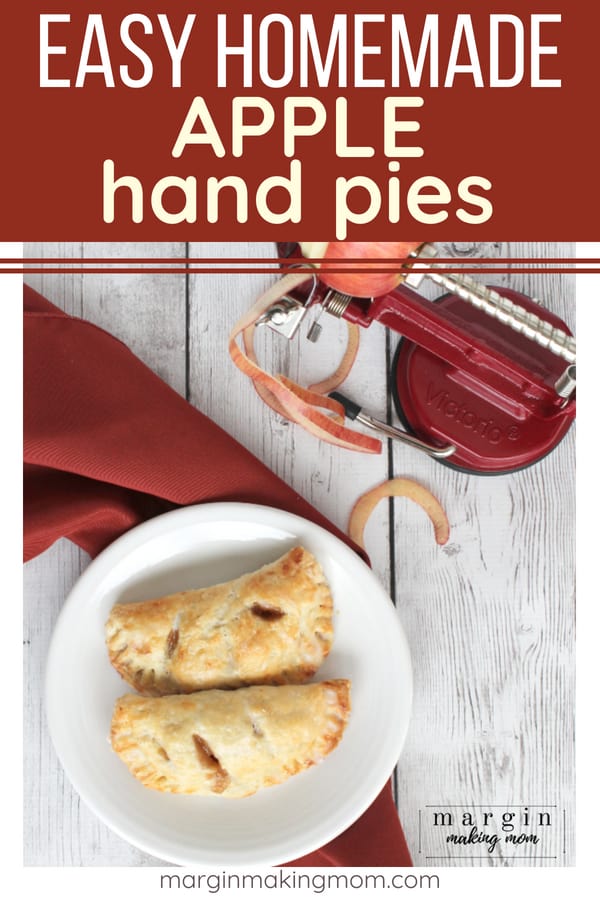
Apple hand pies, or sometimes called apple turnovers, are a delicious treat you can enjoy any time of the year–and no utensils required!
Note: This post may contain affiliate links for your convenience. You can read my full disclosure policy here.
Each fall, my family enjoys visiting local pumpkin patches and apple orchards. The kids love wandering each row of trees, picking as many apples as possible. Although apples tend to keep longer than other “pick your own” fruit, we still end up bringing home far more than we could reasonably eat as-is.
And that’s fine by me, because I love making fall treats with the season’s bounty! A surplus of apples is a fabulous reason to make this Instant Pot apple butter or apple blondies or Instant Pot applesauce or spiced apple butter in the slow cooker–seriously, it’s SO good and the perfect addition to rolls or biscuits.
We also make homemade applesauce, apple cobbler, applesauce bundt cake, apple butter bundt cake, and our newest fave–these easy apple hand pies that I made with my sweet friend Gianna from By Gianna Bakery (fun fact: Gianna and I have been friends ever since we started both started teaching high school, many moons ago!).
But even if you aren’t bringing home bushel-fulls of apples from your local orchard, you can still whip these babies up because it only takes 4 apples to make the filling!
Speaking of filling, this stuff will make your house smell soooo good–better than any apple spice candle will. 🙂
These little apple hand pies are a lovely fall dessert, perfect for any kind of get-together you might have going on–Halloween, Thanksgiving, fall dinner parties, school parties, and more. They’re easy to serve but pack a flavorful punch.
Now, I will say that I personally think these are best when you use homemade pie crust. There’s just nothing like a perfectly flaky, tender crust paired with deliciously sweet filling.
If you’ve never made homemade pie crust before, let me reassure you that it’s actually not nearly as difficult as you might think. I love using the Pioneer Woman’s pie crust recipe as my go-to. But if you don’t want to make your own, you can certainly use store-bought pie crust dough.
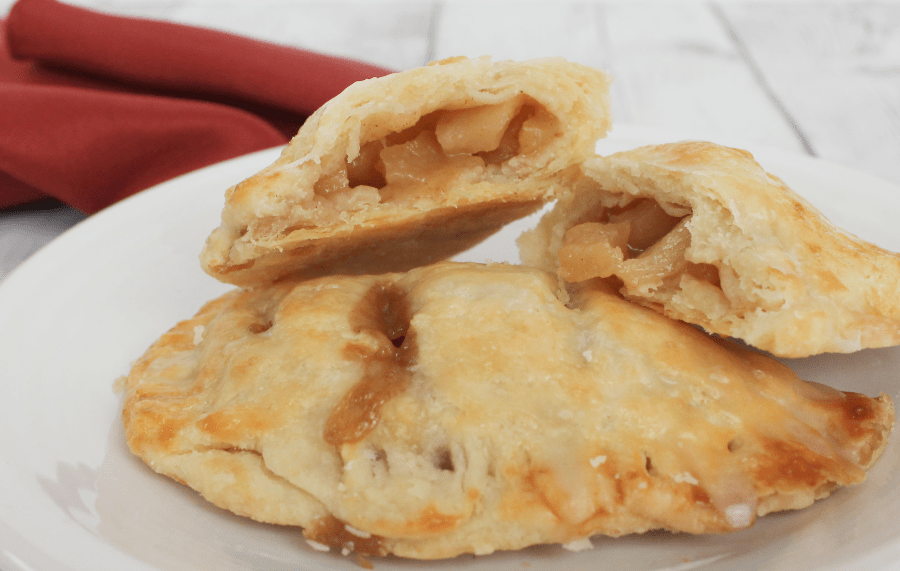
After baking, these hand pies are finished with a drizzle of sweet glaze, making them a to-die-for fall pastry that your family and friends will love!
Other Fall Favorites You’re Sure to Love:
- Pumpkin Pecan Caramel Chip Cookies
- Grandma Wilhelm’s Pumpkin Bread
- Pressure Cooker Pumpkin Spice Bundt Cake
How to Make Easy Apple Hand Pies:
You begin by rolling out your pie crust dough. Use a 4-inch round cutter (a bowl or large glass work well) to cut as many rounds as you can get from your dough (I got 16 rounds from mine).
Cook the apples, brown sugar, cinnamon, and lemon juice together until the apples are soft and darker in color. Add a cornstarch slurry to thicken it up to the consistency of pie filling.
Divide the filling among the crust rounds, only spooning it onto half of each round. Be sure not to put filling too close to the edge. Fold the unfilled half over the filled half, crimping the edges together with the tines of a fork.
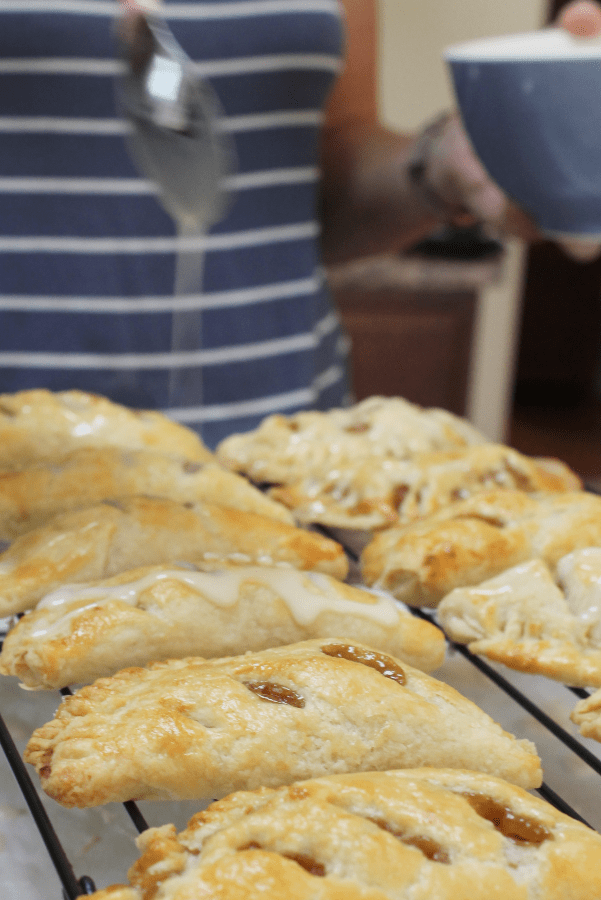
Cut slits in each hand pie and bake until they’re golden brown. Allow them to cool a bit, then drizzle glaze over the warm hand pies. Perfection!
Tips for Making Easy Apple Hand Pies:
- When rolling out dough, I prefer to use a silicone pastry mat and a cloth rolling pin cover, both dusted with flour. The rolling pin cover is really helpful in reducing the amount of flour needed to prevent the dough from sticking to the rolling pin. It seems like such a simple thing, but it really does help make rolling the dough WAY easier.
- Make substitutions as needed! No lemon juice? Just skip it. While it does help to brighten the flavor of the apples, it’s not a make-it-or-break-it ingredient. Prefer a different fruit instead of apples? Use that! I even used some homemade lemon blueberry preserves to make hand pies, which were tasty.
- An apple peeler, corer, and slicer is a game-changer when it comes to preparing apples for various recipes (I also use it to peel potatoes). I usually avoid buying products that really only serve one purpose in the kitchen, but this is an exception. It’s totally worth it because it makes the process so much faster and easier.
- Once apple hand pies have been transferred to cooling racks, put the racks on top of the baking sheets before drizzling with glaze. This way, the glaze will drip onto the pans instead of your counters, making for easier cleanup.
Recommended Equipment:
- Baking sheets
- Mixing bowl
- apple peeler, corer, and slicer
- Rolling pin cover
- silicone pastry mat
- Medium saucepan
- Small wire whisk
- 4-inch round cutter
Easy Apple Hand Pies
Apple hand pies make for a delicious dessert--no utensils required!
Ingredients
- Dough for 2 unbaked pie crusts
- 4 medium-large apples, peeled and diced
- 1/2 cup brown sugar
- 1 Tbs cinnamon
- juice from half of a lemon
- 2 Tbs cornstarch
- 2 Tbs cold water
- 1 egg
- 1 Tbs water
- Glaze:
- 1 cup confectioner's sugar
- 2-4 Tbs milk, depending on desired thickness
- 1/2 tsp vanilla extract (optional)
Instructions
- Preheat oven to 375F. Prepare two baking sheets by lining with parchment paper.
- Prepare pie crusts by rolling out each round of dough until about 1/4" thick.
- Combine apples, brown sugar, cinnamon, and lemon juice in a medium saucepan over medium heat. Cook, stirring occasionally, until apples have softened and become darker in color. If desired, use a potato masher or fork to smash some of the apples into smaller pieces.
- Create a slurry by whisking together cornstarch and cold water.
- Increase heat to medium-high and add slurry to the apple mixture, stirring constantly until the liquid thickens to the consistency of pie filling. Remove from heat and allow to cool slightly.
- While filling mixture is cooling, use a 4-inch round cutter (a bowl or large glass works great) to cut circles out of the pie crust dough.
- Divide filling between each circle of dough, only spooning filling onto half of the circle. Do not add filling to the edge of the circle.
- Fold the other half of the dough circle over the filling, and use fingers or a fork to crimp the edges of the dough closed, forming a seal. Transfer each hand pie to prepared baking sheets.
- Use a knife to cut 2-3 slits in the top of each hand pie.
- In a small bowl, whisk together 1 egg and 1 Tbs water until completely combined. Lightly brush this egg wash over the top of each hand pie.
- Bake for 20-25 minutes, or until crust is golden brown. Remove from oven and transfer pies to cooling racks.
- Prepare glaze by whisking together confectioners sugar, milk, and vanilla extract (if using), until smooth. When hand pies are slightly cooled but still warm, drizzle glaze over each.
Notes
- When rolling out dough, I prefer to use a silicone pastry mat and a cloth rolling pin cover, both dusted with flour. The rolling pin cover is really helpful in reducing the amount of flour needed to prevent the dough from sticking to the rolling pin. It seems like such a simple thing, but it really does help make rolling the dough WAY easier.
- Make substitutions as needed! No lemon juice? Just skip it. While it does help to brighten the flavor of the apples, it's not a make-it-or-break-it ingredient. Prefer a different fruit instead of apples? Use that! I even used some homemade lemon blueberry preserves to make hand pies, which were tasty.
- An apple peeler, corer, and slicer is a game-changer when it comes to preparing apples for various recipes (I also use it to peel potatoes). I usually avoid buying products that really only serve one purpose in the kitchen, but this is an exception. It's totally worth it because it makes the process so much faster and easier.
- Once apple hand pies have been transferred to cooling racks, put the racks on top of the baking sheets before drizzling with glaze. This way, the glaze will drip onto the pans instead of your counters, making for easier cleanup.
Recipe from By Gianna Bakery
Nutrition Information:
Yield:
14Serving Size:
1Amount Per Serving: Calories: 326Total Fat: 13gSaturated Fat: 5gTrans Fat: 0gUnsaturated Fat: 7gCholesterol: 14mgSodium: 224mgCarbohydrates: 51gFiber: 3gSugar: 22gProtein: 2g
Nutrition information is automatically calculated and is not guaranteed for accuracy.


Easy family-friendly recipes in your inbox!