

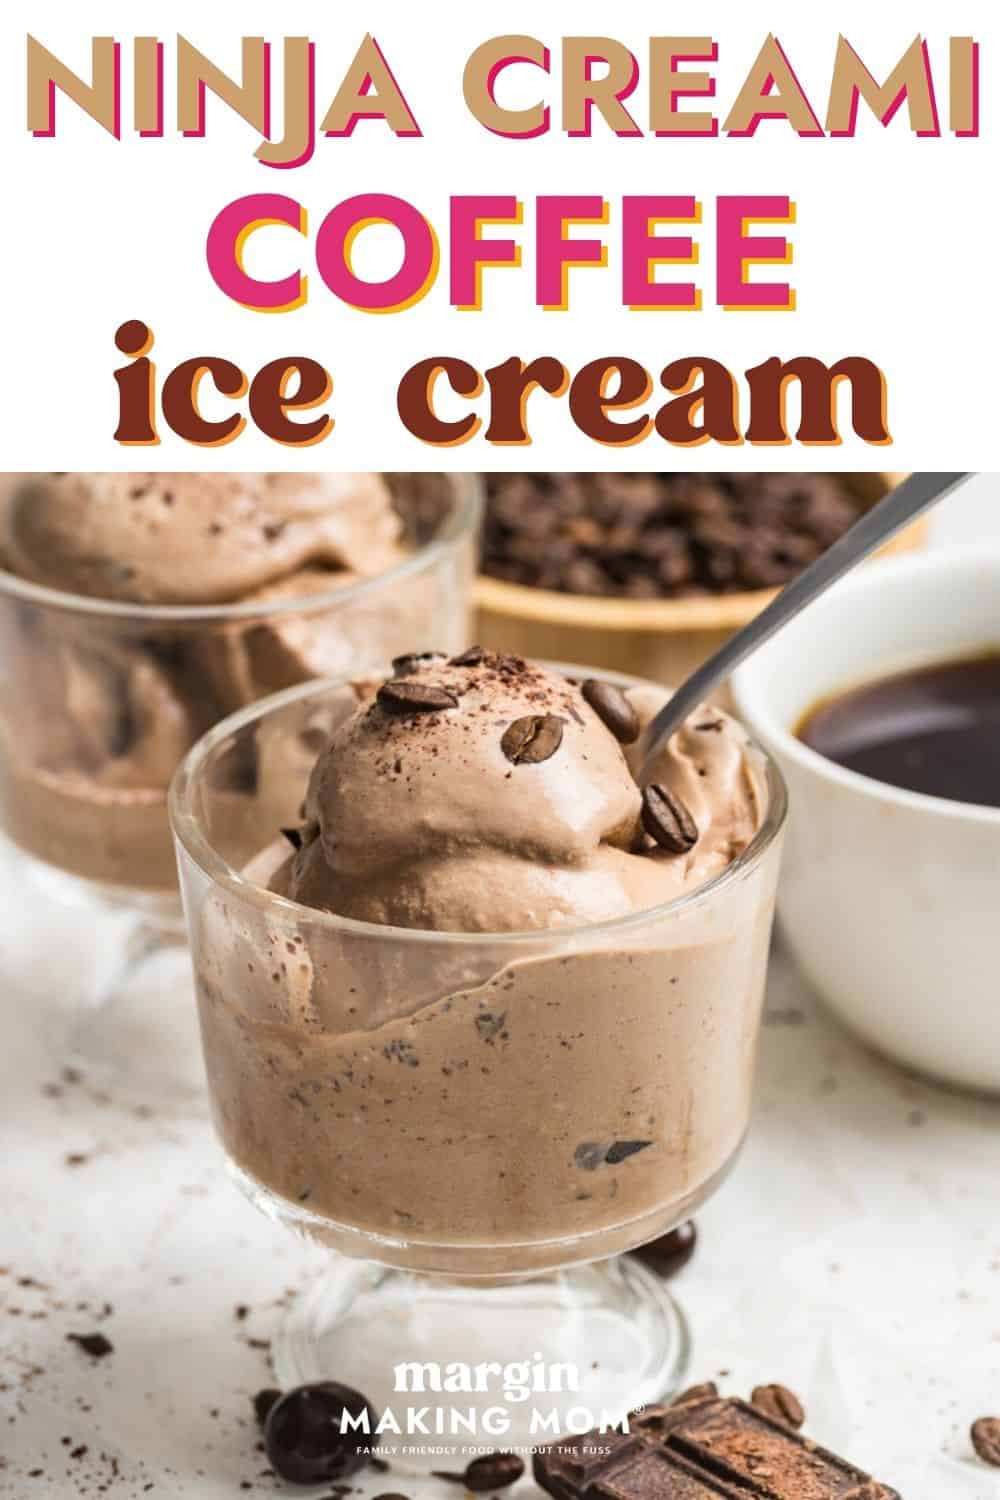
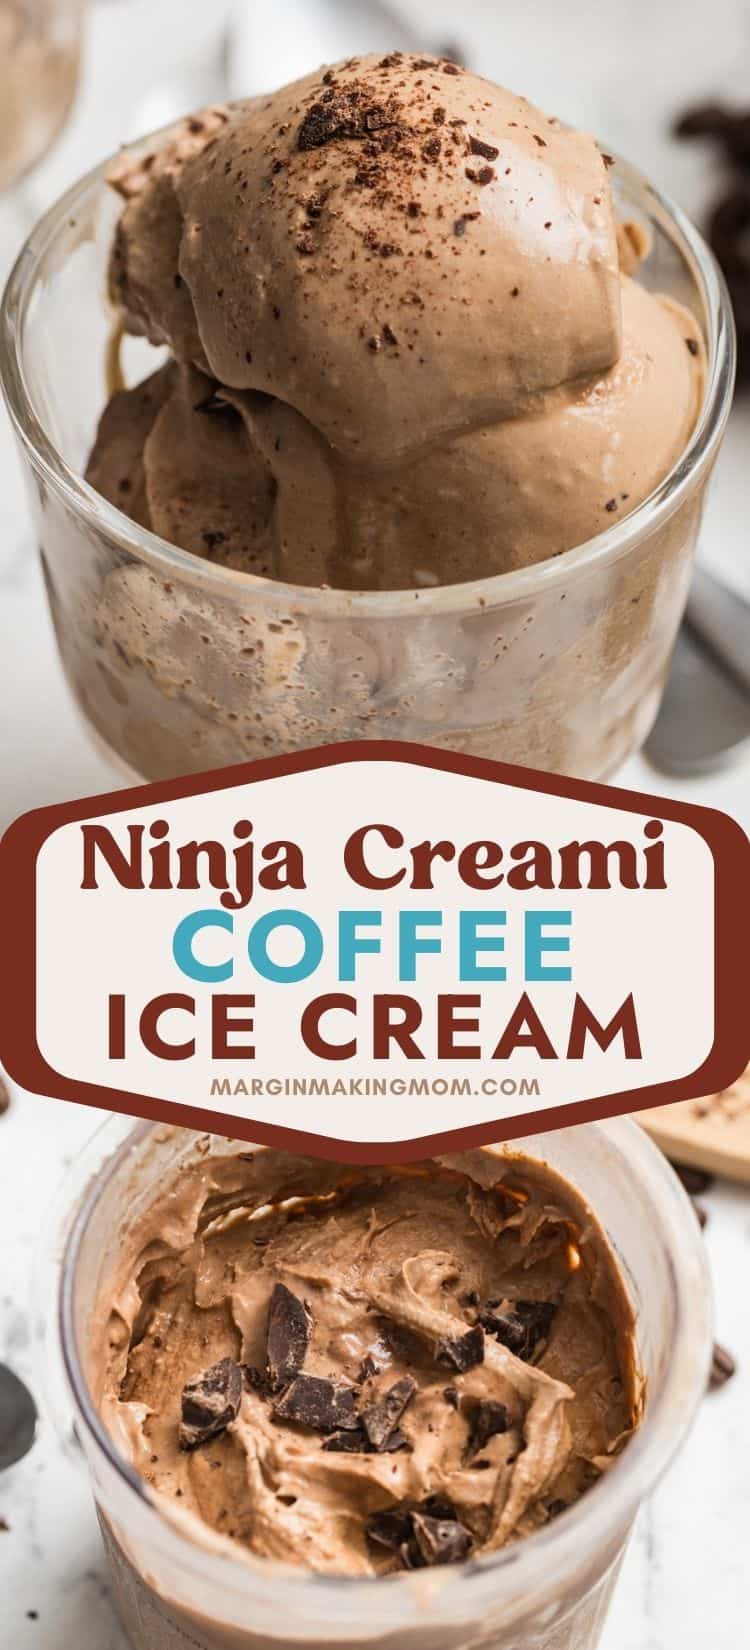
Easy Ninja Creami Coffee Ice Cream
Making coffee ice cream in the Ninja Creami is an easy way to create a frozen dessert with all the flavors of your favorite iced mocha.
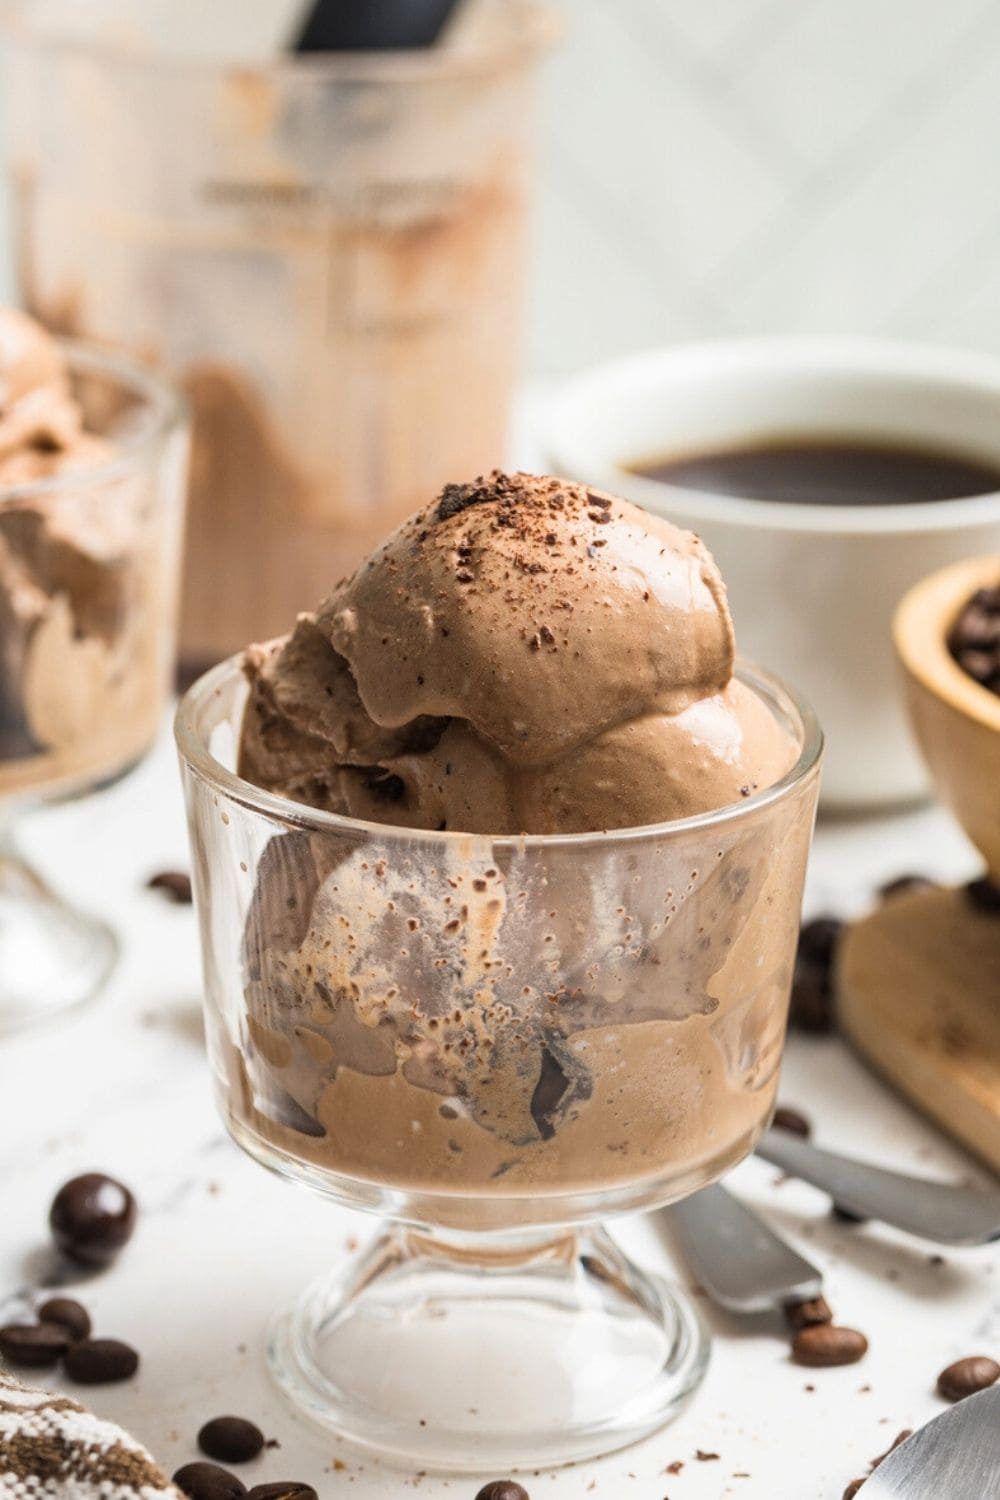
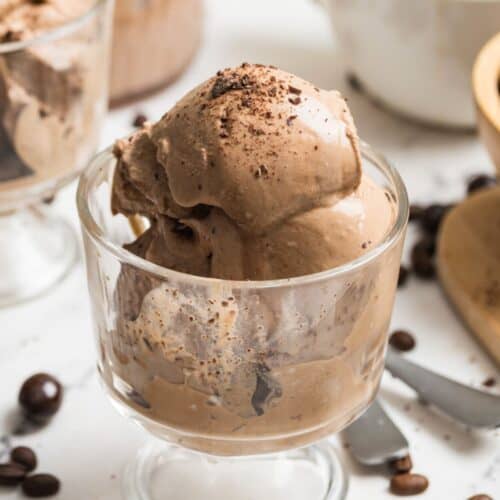
Silky smooth Ninja Creami coffee ice cream is made with instant espresso powder, giving plenty of flavor without an icy texture. Chocolate chunks are mixed in at the end to make it even more decadent!
Note: This post may contain affiliate links for your convenience. If you make a purchase, this site may receive a small commission at no additional cost to you. You can read my full disclosure policy here.
Enjoying a steaming hot cup of coffee may be a great way to start your morning, but for the rest of the day, coffee ice cream is the sweetest way to indulge your craving, if you ask me!
And since it’s so easy to make Ninja Creami coffee ice cream, there’s really no excuse not to whip up a batch so you can have a frozen treat for dessert.
Best of all, you just need a handful of ingredients, and the result is a creamy, velvety soft coffee ice cream with hints of chocolate.
It’s on our list of the best Ninja Creami recipes, and once you give it a try, you’ll see why!
Making Coffee Ice Cream in the Ninja Creami
To give this ice cream the best flavor and texture, we’re using instant espresso powder. Since it has a concentrated flavor, a little bit goes a long way. I use it in my coffee cupcakes recipe, too!
And it works better than brewed coffee, because it would take quite a bit of coffee to achieve the same flavor. And since coffee is mostly water, it would give an icier texture to the ice cream.
So to get the flavor while still keeping a smooth texture, espresso powder is the way to go!
Then heavy cream and milk give the creaminess we love, and a little bit of cocoa powder gives it a mocha ice cream flair.
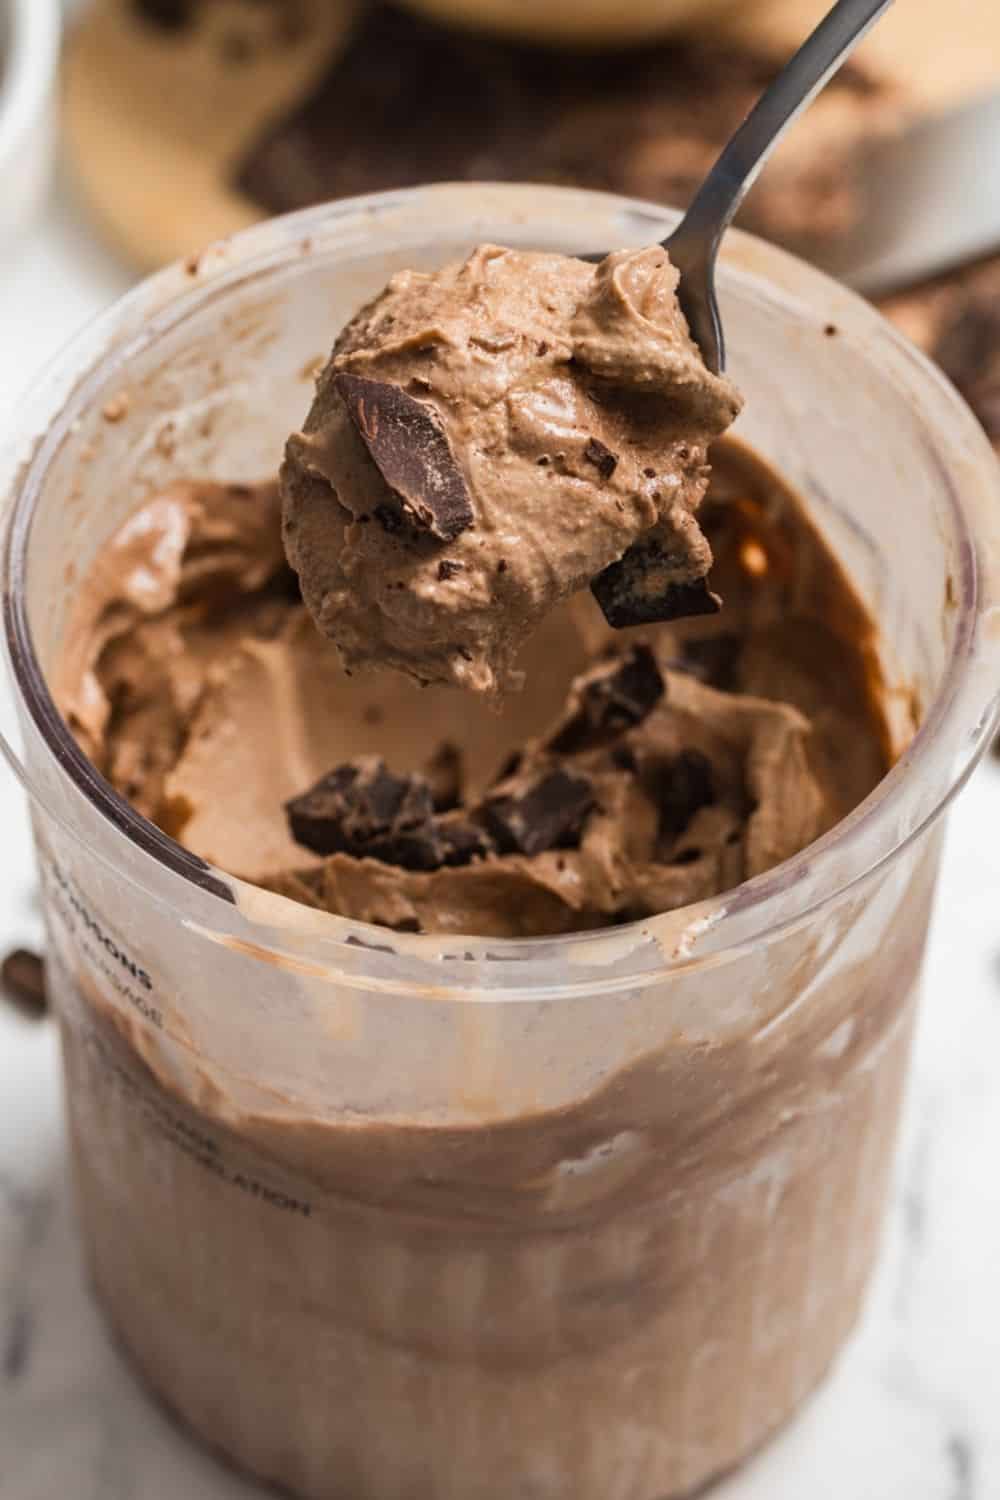
Add in some chocolate chunks at the end, if you’d like, to make it even more decadent!
New to the Ninja Creami?
Did you recently get a new Ninja Creami machine? Check out our printable collection of Ninja Creami recipes!

How to Make Ninja Creami Coffee Ice Cream
It’s really easy to make this frozen treat.
Ingredients You’ll Need
- Whole Milk
- Heavy Cream
- Vanilla Extract
- Sugar
- Salt
- Instant Espresso Powder
- Cocoa Powder
- Optional: Chocolate Chunks
How to Make It:
Find the full printable recipe available below
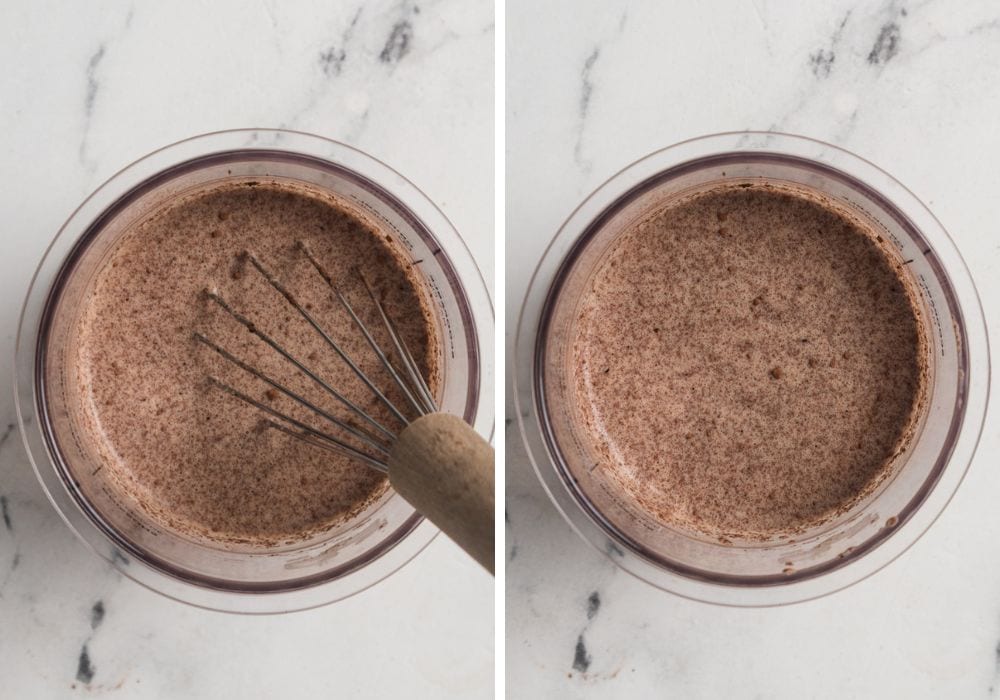
Mix the base. First, you’ll combine sugar, espresso powder, cocoa powder, and salt in a mixing bowl, large liquid measuring cup, or your pint container. Whisk to combine well.
Add in the milk, heavy cream, and vanilla extract. Whisk well until the dry ingredients have dissolved. You can also use an immersion blender for this step, if you’d like!
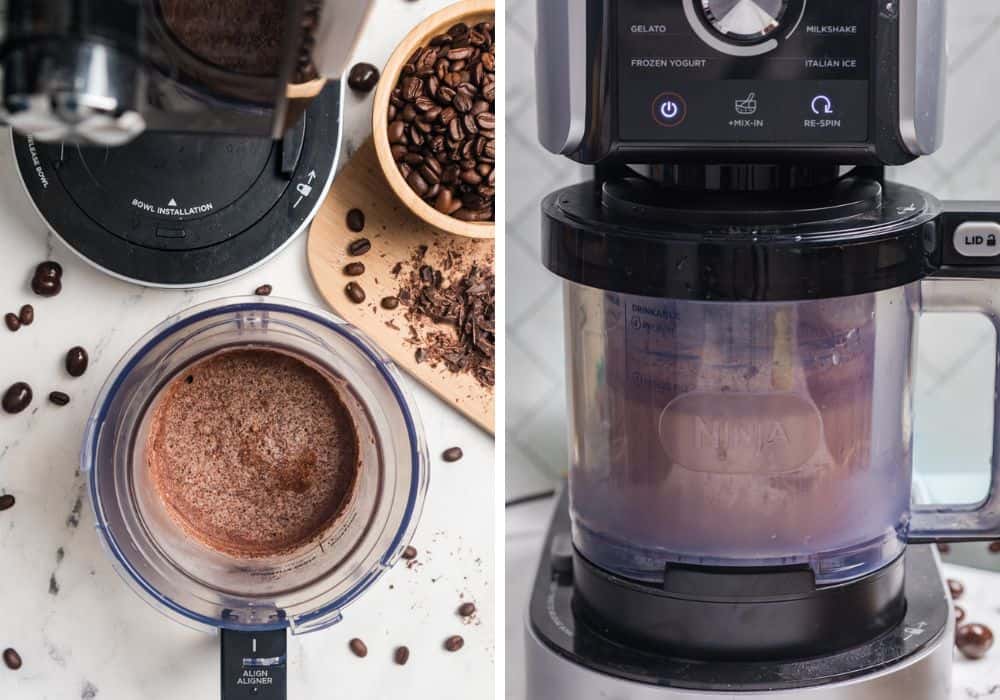
Pour the mixture into a Ninja Creami pint container.
Freeze. Then, you’ll close the lid on the pint container, transfer it to a level surface in your freezer, and let it freeze for at least 24 hours.
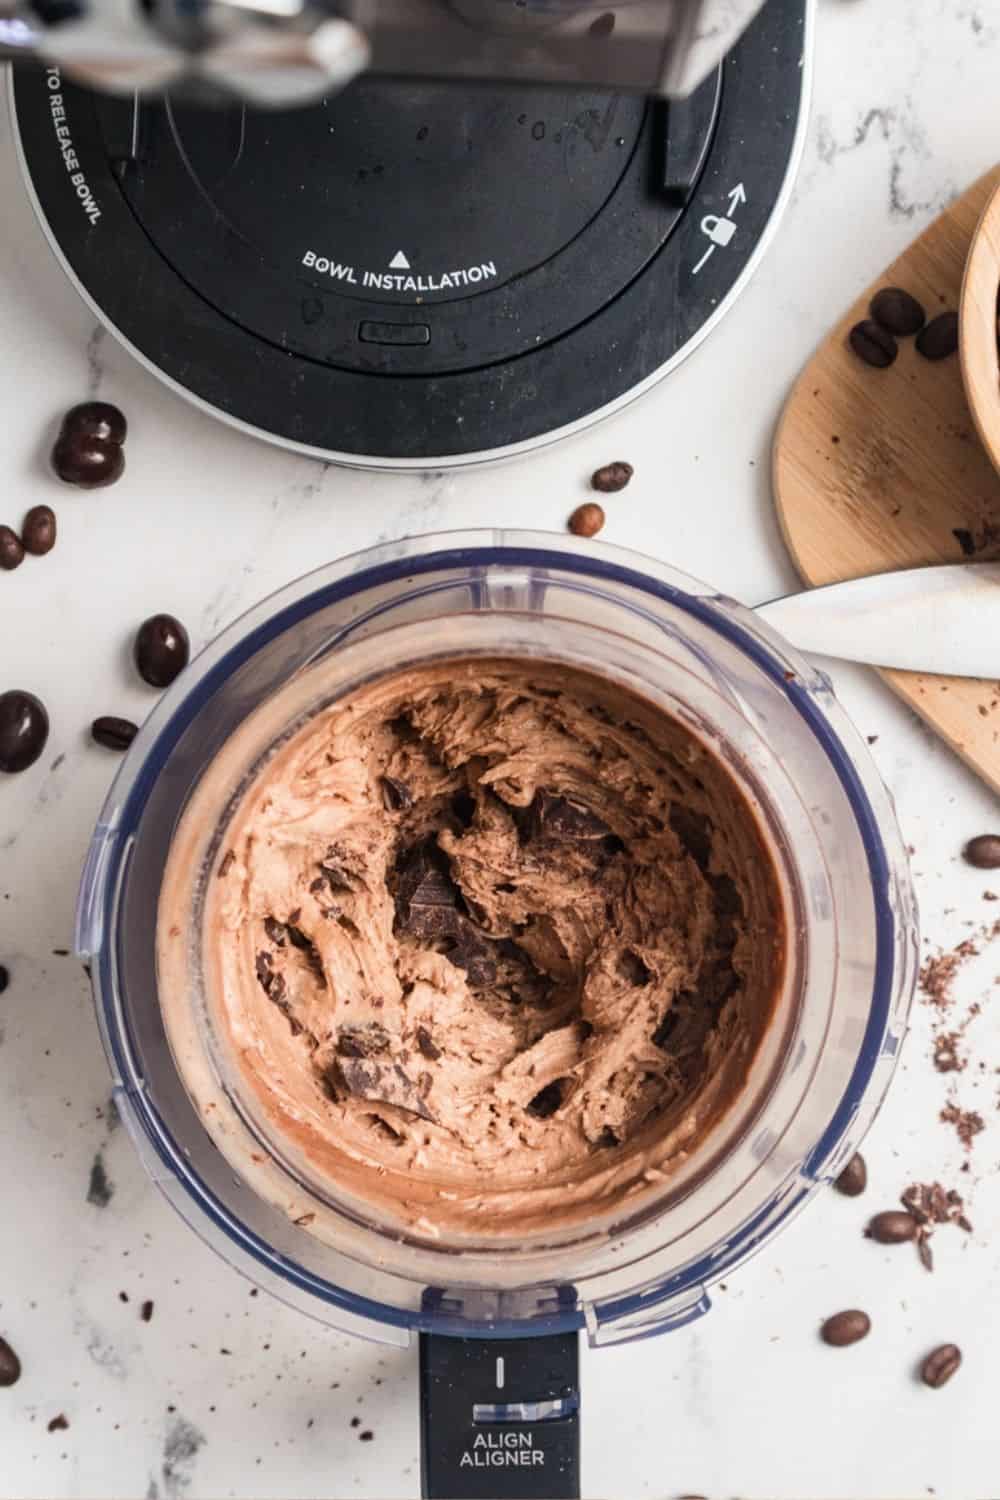
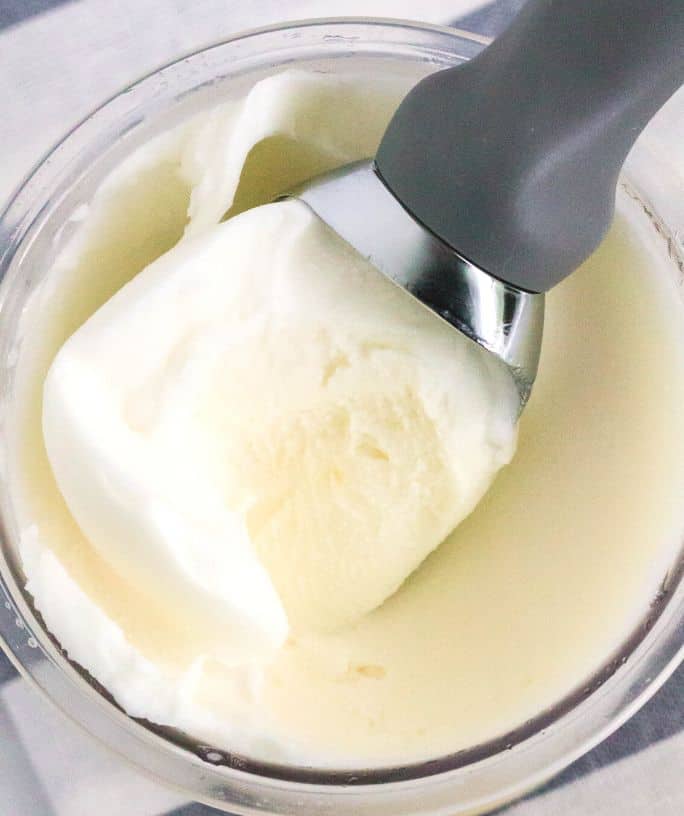
Spin the ice cream. Then, you’ll remove the pint from the freezer, take off its lid, and place it into the outer bowl of the Ninja Creami.
Secure the outer bowl into the machine and press the Ice Cream button. Let the cycle complete.
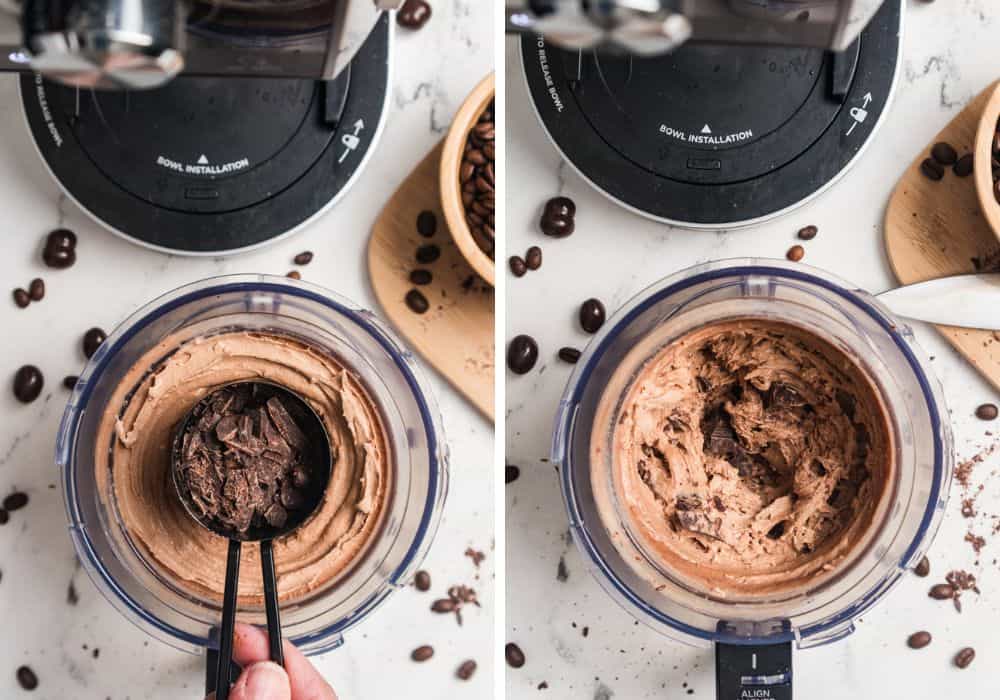
Re-spin and Mix-in. Then, you’ll check the texture of the ice cream. If it’s crumbly or powdery, add a tablespoon of milk and insert it back into the machine. Use the Re-spin button to cycle it again.

If you’re adding chocolate chunks as a mix-in, create a well in the center of the ice cream that extends down to the bottom of the pint.
Add your chocolate chunks to the well, insert the pint back into the machine, and use the Mix-in function to incorporate the chunks into the ice cream.
Then serve and enjoy!
Notes and Adaptations:
- For the best flavor and texture, use espresso powder, not ground coffee. Using espresso powder instead of brewed coffee gives a stronger flavor without the icy texture from coffee.
- If you prefer a more coffee-forward flavor, simply omit the cocoa powder for a coffee ice cream with chocolate chunks.
- Whisk cocoa powder thoroughly to avoid clumps in the base.
- Adjust the coffee strength by using 1 tablespoon for mild mocha or 2 tablespoons for stronger coffee flavor.
- Use chopped chocolate instead of chips for larger chocolate pockets.
- Mocha Creamicino: To make this into a “Creamiccino” or Frappe in the Ninja Creami Deluxe: use the frozen base and add milk to the “Drinkable” line, then spin on Creamiccino function or Milkshake function.
Recommended Equipment:
Ninja Creami Coffee Ice Cream
Ingredients
For Ice Cream Base:
- ⅓ cup granulated sugar
- 1-2 tablespoons instant espresso powder (depending on how strong you want the coffee flavor)
- 1 tablespoon unsweetened cocoa powder
- ¼ teaspoon salt
- 1 cup whole milk
- 3/4 cup heavy cream
- 2 teaspoons vanilla extract
For Optional Mix-In:
- 1/3 cup chocolate chunks or chocolate chips
Instructions
- In a medium bowl or large liquid measuring cup, whisk together the sugar, instant espresso powder, cocoa powder, and salt. This helps prevent cocoa clumps.
- Whisk in the whole milk, heavy cream, and vanilla extract. Mix until the sugar is dissolved and the mixture is completely smooth. You can also use an immersion blender for this step, if preferred.
- Pour the mixture into the Ninja Creami pint container, making sure not to exceed the max fill line. You can also mix directly into the pint container. Make sure to secure the lid.
- Place the pint on a level surface in the freezer. Freeze for at least 24 hours.
- Remove the pint from the freezer and take off its lid. Insert the pint into the Ninja Creami's outer bowl, then lock the outer bowl into place in the machine. Select the Ice Cream setting and allow the cycle to complete.
- Remove the pint from the machine and check the ice cream's texture. If it is crumbly, add 1–2 tablespoons milk to the ice cream, insert it back into the machine, and select Re-Spin. It should be nice and creamy after that!
If Adding a Mix-in:
- Make a well in the center of the ice cream base that's about an inch wide and extends to the bottom of the pint container. Add the chocolate chunks or chocolate chips to the well. Select the Mix-In function and allow the cycle to finish.
Notes
- For the best flavor and texture, use espresso powder, not ground coffee. Using espresso powder instead of brewed coffee gives a stronger flavor without the icy texture from coffee.
- If you prefer a more coffee-forward flavor, simply omit the cocoa powder for a coffee ice cream with chocolate chunks.
- Whisk cocoa powder thoroughly to avoid clumps in the base.
- Adjust the coffee strength by using 1 tablespoon for mild mocha or 2 tablespoons for stronger coffee flavor.
- Use chopped chocolate instead of chips for larger chocolate pockets.
- Mocha Creamicino: To make this into a “Creamiccino” or Frappe in the Ninja Creami Deluxe: use the frozen base and add milk to the “Drinkable” line, then spin on Creamiccino function or Milkshake function.
Nutrition
Did you try this recipe?
Don’t forget to leave a rating below and make sure to follow on Instagram and Pinterest for more easy recipes!
More Ninja Creami Recipes You’ll Love:
- Ninja Creami Rocky Road Ice Cream
- Ninja Creami Vanilla Ice Cream
- Ninja Creami Pistachio Gelato
- Decadent Ninja Creami Chocolate Ice Cream
- Easy Ninja Creami Mint Chocolate Chip Ice Cream
- Ninja Creami Copycat Chunky Monkey Banana Ice Cream
- Ninja Creami Pineapple Sorbet
- Ninja Creami Orange Sherbet
- Ninja Creami Vanilla Gelato
- Ninja Creami Orange Soda Ice Cream
- The Best Ninja Creami Peach Sorbet
- Ninja Creami Sorbet with Fresh Cherries
- Ninja Creami Lemon Curd Gelato
- Ninja Creami Copycat DQ Blizzard
- Ninja Creami Pumpkin Cheesecake Ice Cream
- Ninja Creami Chocolate Cottage Cheese Ice Cream
- Ninja Creami Swirl Vanilla Soft Serve
- Ninja Creami Oreo Frozen Yogurt
- Ninja Creami Strawberry Gelato
- Ninja Creami Fresh Strawberry Sorbet
Don’t forget to save this recipe to your Ninja Creami board on Pinterest!


Easy family-friendly recipes in your inbox!