

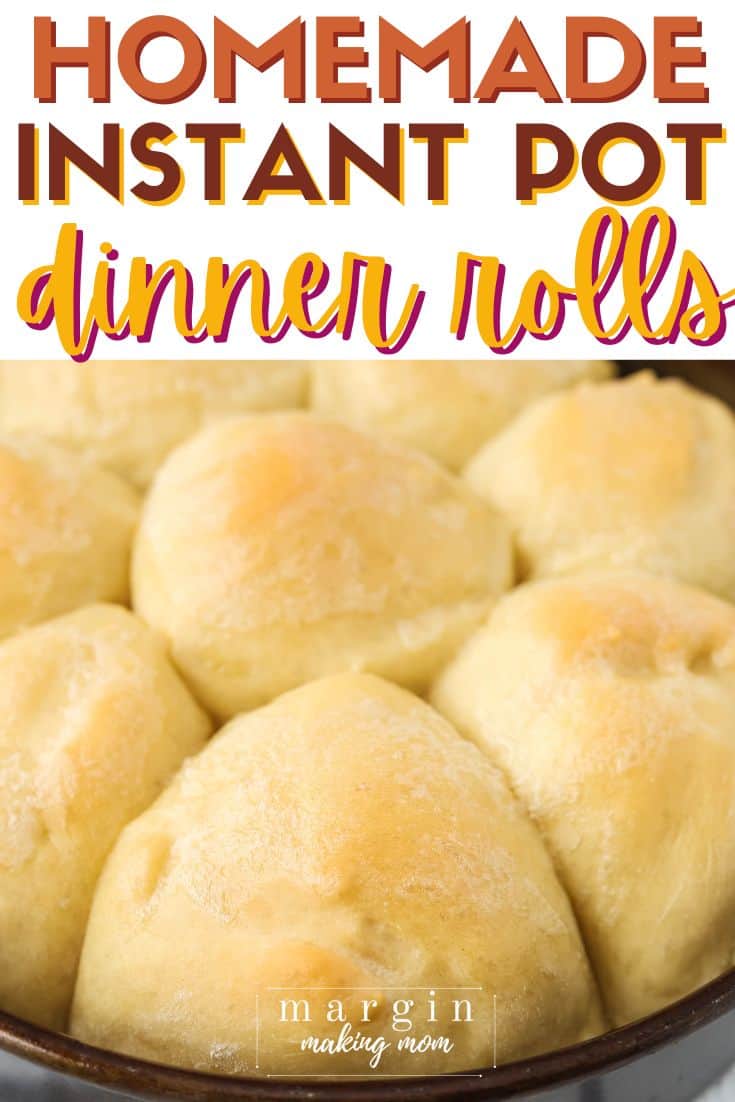
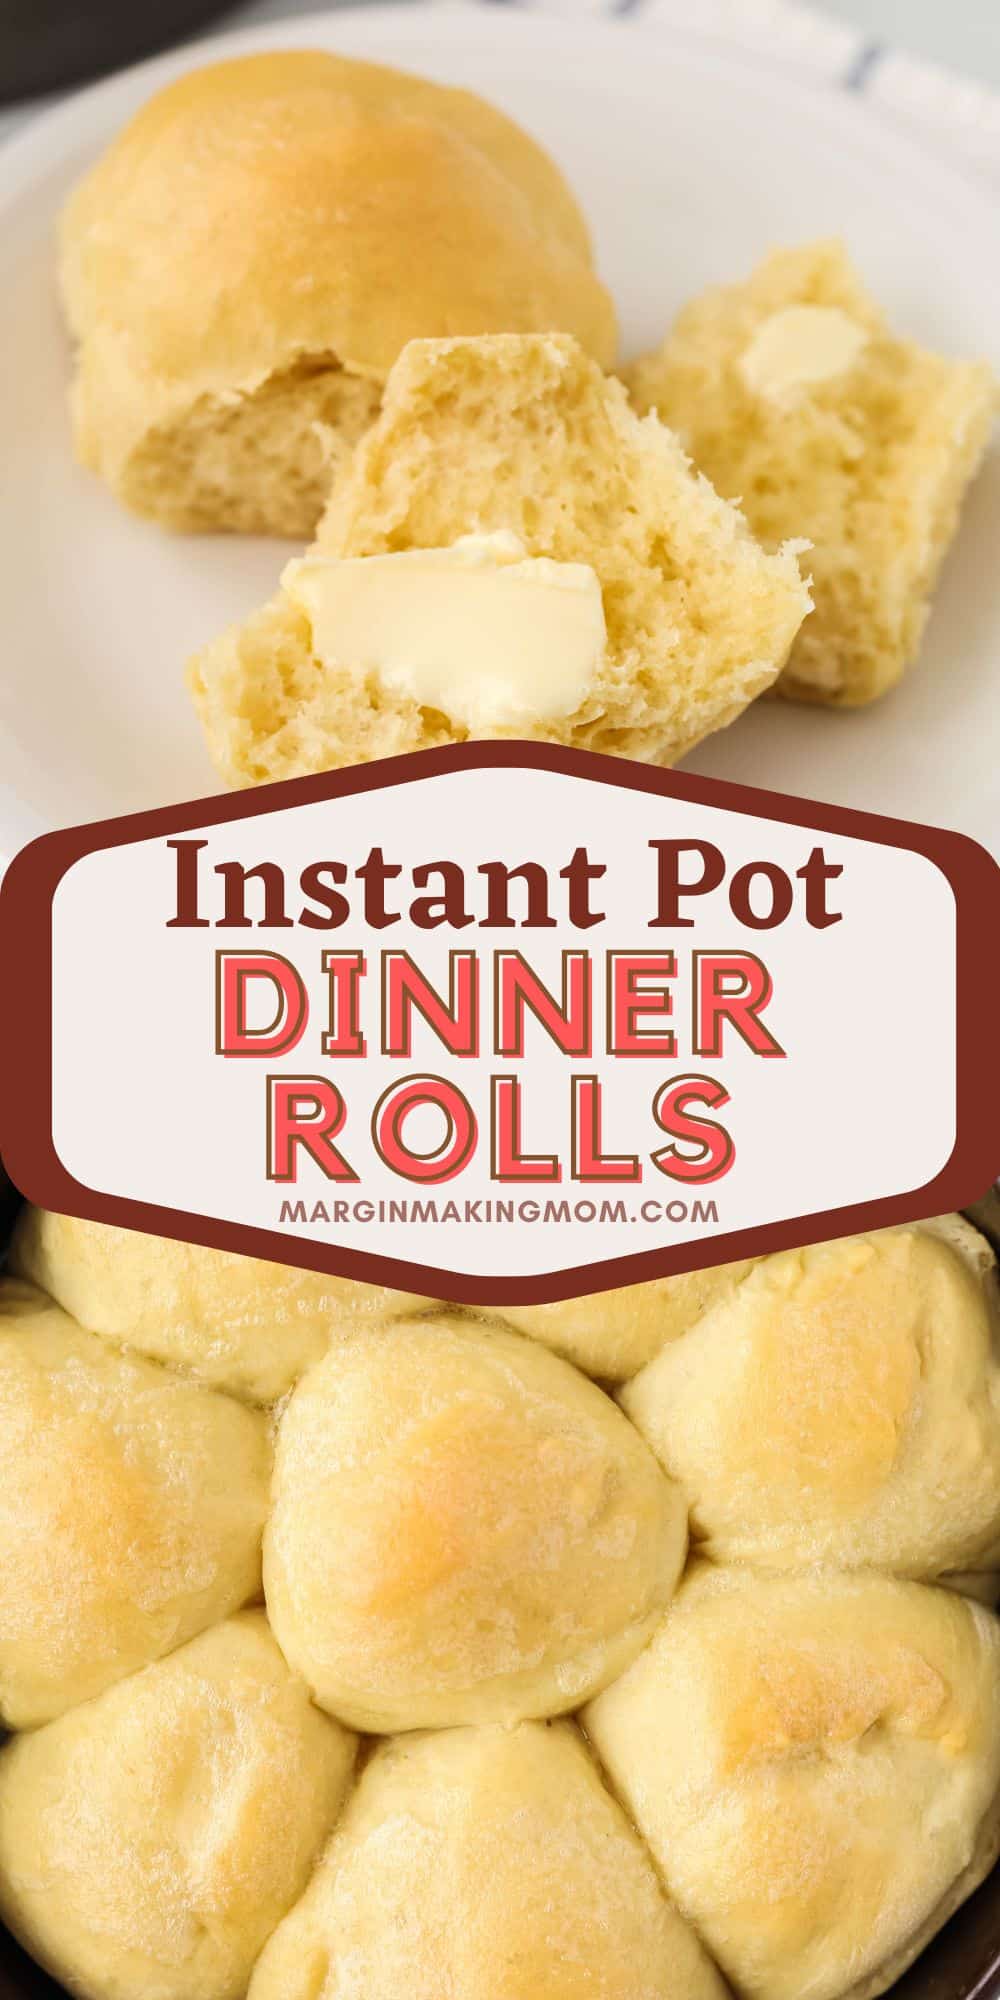
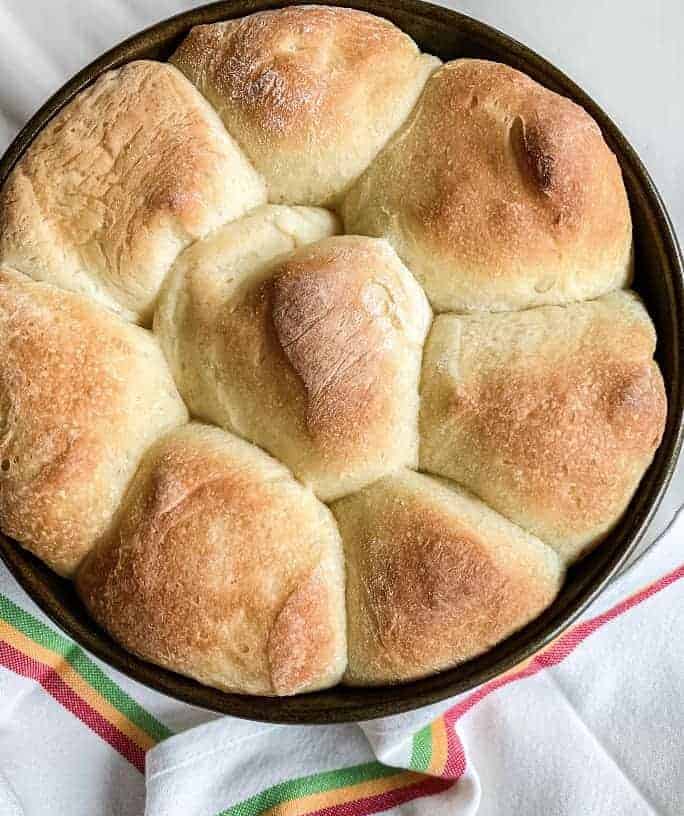
Perfect Homemade Instant Pot Dinner Rolls
Using the Instant Pot to rise the dough for homemade dinner rolls yields soft and fluffy rolls in less time.
Instant Pot dinner rolls are easy to make when you can proof dough in the Instant Pot!
UPDATED March 26, 2024
Note: This post may contain affiliate links for your convenience. If you make a purchase, this site may receive a small commission at no additional cost to you. You can read my full disclosure policy here.
My great-grandmother was known for her dinner rolls. She brought them to every family function, and they were amazing!
Soft, fluffy, and perfect split open with a pat of butter spread into the tender centers.
She passed away when I was a teenager, and I sure do wish I had taken the time to learn her roll recipe.
My mom occasionally made homemade rolls, but most often she used frozen Rhodes rolls for our holidays and special occasions.
They are pretty darn tasty, but I have to admit that I have a thing for homemade bread.
There’s just something about working the dough with my hands and, of course, the smell of fresh-baked bread that makes you feel at home.
I’ve been making homemade dinner rolls for my family for years.
Most often, I’ve used my bread machine to mix, knead, and rise the dough for me. Then I use my hands to shape the dough and allow a final rise before baking.
However, this past Thanksgiving and Christmas I was tasked with bringing rolls to our family feast.
My bread machine can make enough dough for two pans of rolls, but given their popularity and the crowd we were feeding, I knew I’d need 4 pans of rolls.
So I decided to make one batch of dough in my bread machine and make the other batch using the Instant Pot to rise the dough.
I’m happy to report that the Instant Pot method worked fabulously!

Can You Proof Dough in an Instant Pot?
After performing my experiment, I can tell you the answer is YES! And honestly, it’s really simple.
You can make your favorite bread recipe using my instructions for how to proof dough in the Instant Pot!
The Instant Pot is actually a great environment for proofing dough, because the yogurt setting allows it to be kept at a steady temperature, just like a bread machine does.
This creates the perfect environment for yeast to metabolize carbohydrates through fermentation and produce carbon dioxide as a byproduct.
The CO2 gas the yeast produces is what creates all of the little bubbles of air in bread dough and results in soft, fluffy, spongy rolls.
(Did you know I have a degree in Biology and I used to be a high school biology teacher? I’m a total science nerd at heart. #truestory)
I use the Instant Pot proofing method when I make my easy french bread and homemade soft pretzels, and also Instant Pot naan and Instant Pot pizza dough.
You can also proof dough AND “bake” it in the Instant Pot for this no-knead Instant Pot bread recipe!
Not only that, but you can also do a quick rise of frozen Rhodes rolls in the Instant Pot.
So many options!
To use the Instant Pot to rise the dough for your dinner rolls, you first have to make the dough.
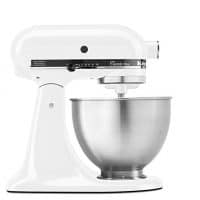
I used my KitchenAid stand mixer to make easy work of this process.
How to Make Instant Pot Dinner Rolls
It’s easy to mix up a batch of bread dough to make some rolls with.
Ingredients You’ll Need:
- Water
- Yeast
- Salt
- Sugar
- Butter
- Egg
- All Purpose Flour or Bread Flour
How to Make the Dough:
(Full printable recipe card is available below)
Proof the yeast. This step isn’t necessary, but if you have a few minutes, go ahead and do it.
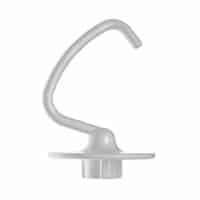
First, you’ll start to combine all of the dough ingredients into the bowl of your stand mixer, fitted with the dough hook attachment.
I like to start with the warm water, instant yeast, salt, sugar, and butter. Let it sit for a few minutes to allow the yeast to proof (it will get nice and foamy). Then add the egg.
If you don’t have time to let the yeast proof, just mix the ingredients together and move on!
Add flour. Then, with the mixer on low speed, I add the flour, a little bit at a time.
Knead. Use the dough hook to mix and knead this for 10 minutes.
Alternatively, you can knead by hand if you don’t have a stand mixer.
How to Use the Instant Pot to Rise Dough:
Once the dough has been kneaded, oil the insert pot of your Instant Pot.
You just need a thin layer of oil around the bottom and sides of the insert pot so the dough won’t stick too much. I used cooking spray to oil mine.
Next, transfer the ball of dough from the stand mixer to the insert pot.
Turn it over a couple of times to coat the outside of the dough ball with oil.
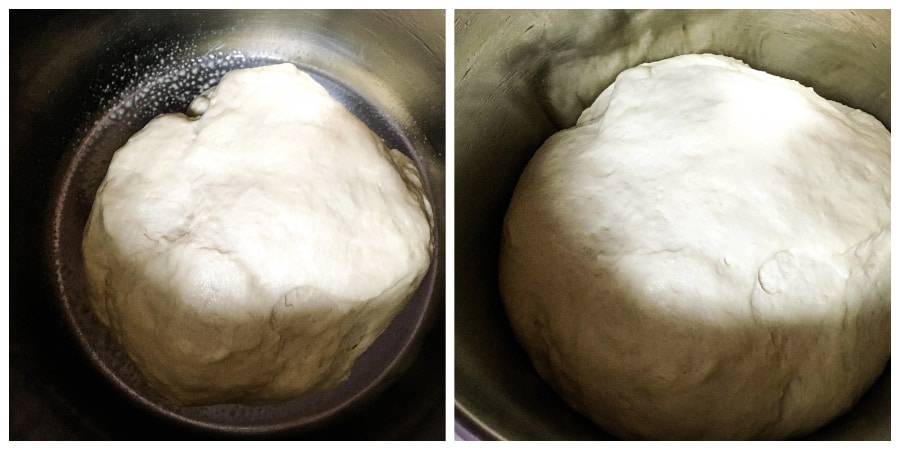
Next, you’ll place the lid onto the Insert Pot and select the Yogurt button and allow the dough to proof for one hour.
The dough should roughly double in size during that time, as you can see in the before and after photos below.
The dough will rise quicker this way than if you were letting it rise at room temperature.
How to Make Homemade Rolls With Dough Proofed in the Instant Pot
From this point on, the steps are the same as if you had used a different method for the dough rise.
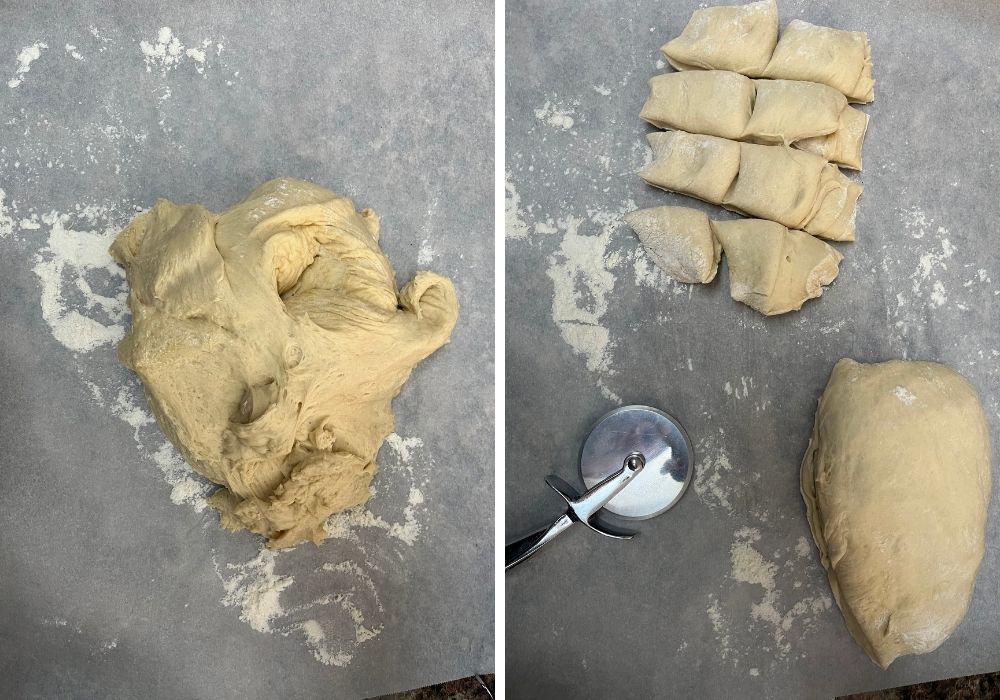
Divide the dough. Once an hour has passed, punch down the dough and remove to a lightly floured surface.
Shape the dough into a ball and cut into 18 pieces that are fairly equal in size.
You can do this by cutting it into two halves, then cutting each half into 9 pieces. You could also divide the ball into thirds, then cut each third into six pieces.
However you like, just divide it into 18 pieces.
Roll each of those pieces into a ball shape. They don’t have to be perfect–just somewhat round.
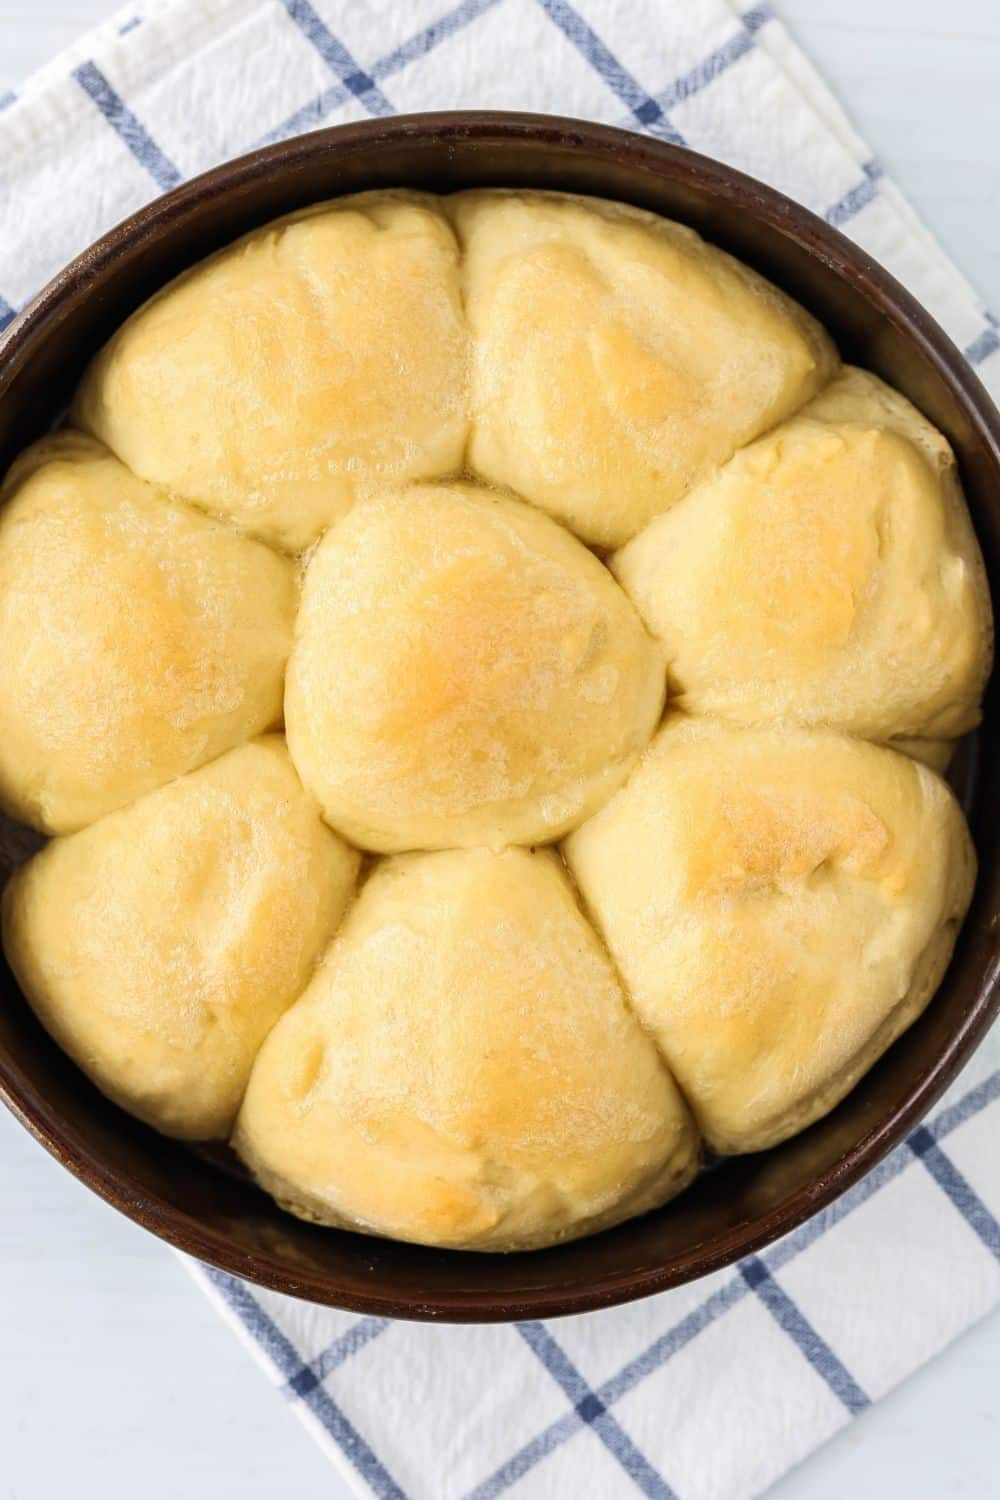
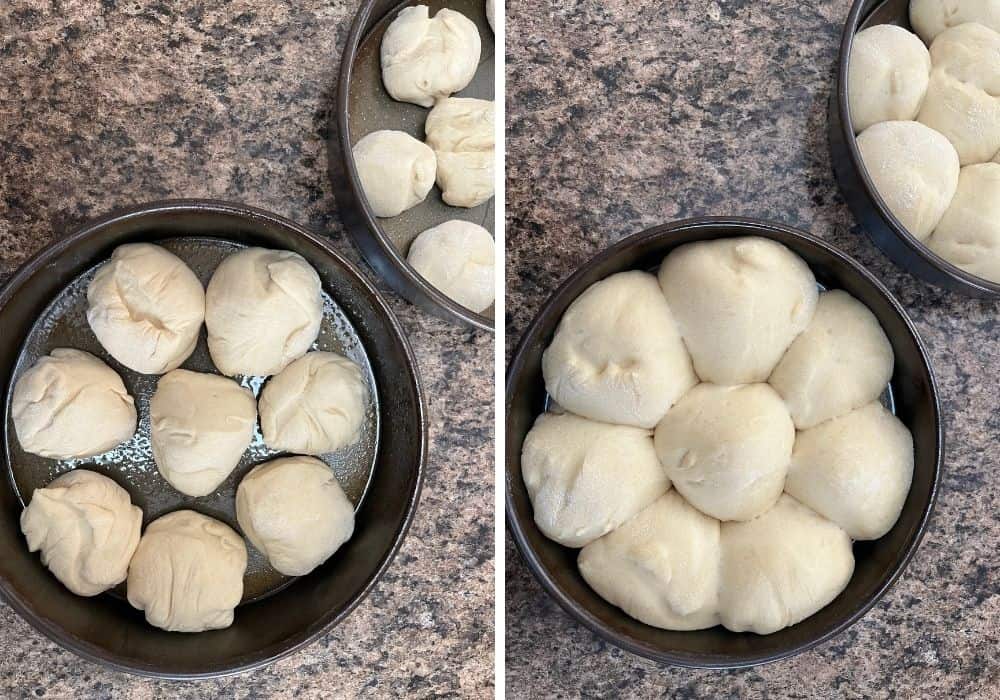
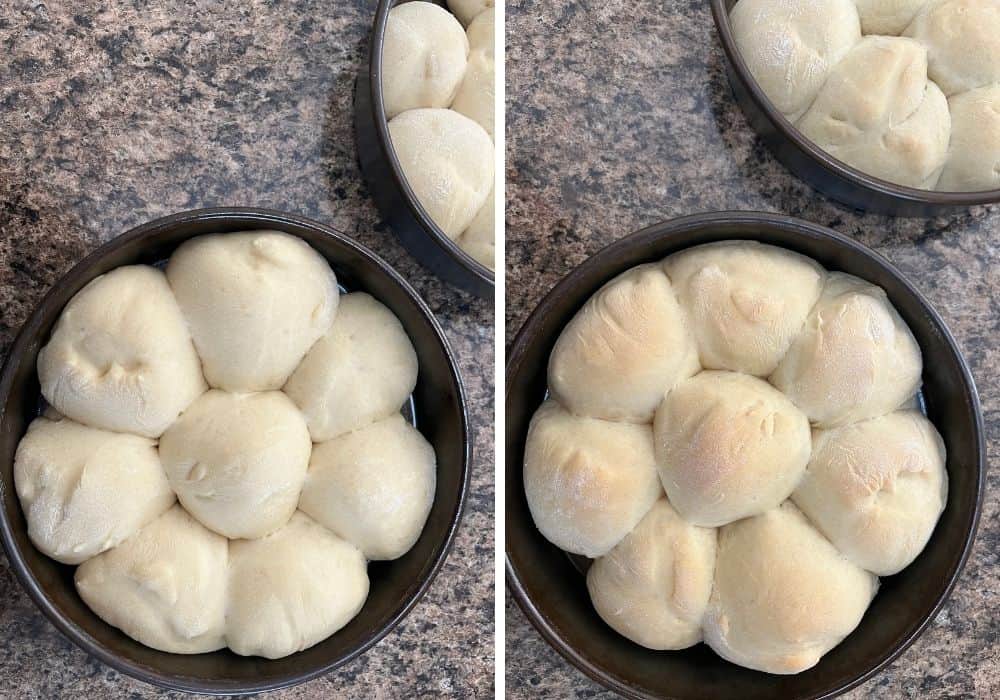
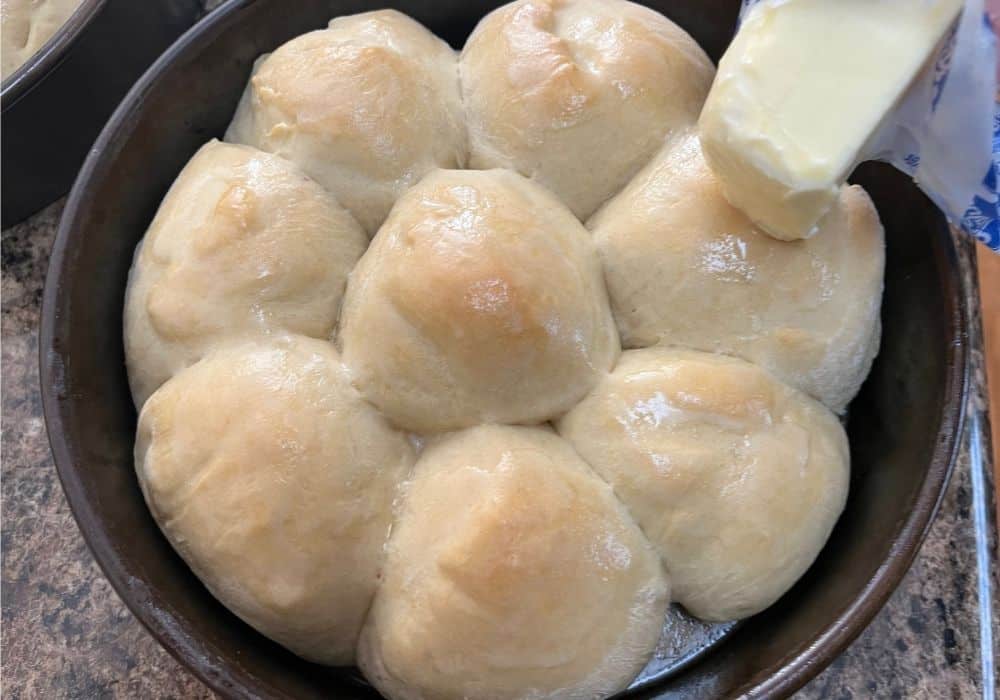
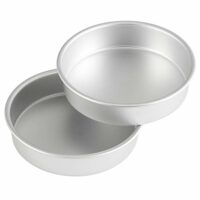
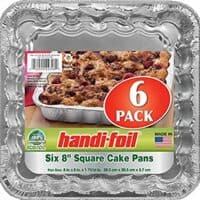
Second rise. Place nine pieces of dough into a greased pie pan or a round or square 8″ cake pan. Then repeat with another pan, so you have two pans of rolls.
If I’m taking these rolls somewhere, I’ll usually use foil pans. You could also place them in muffin tins or on baking sheets.
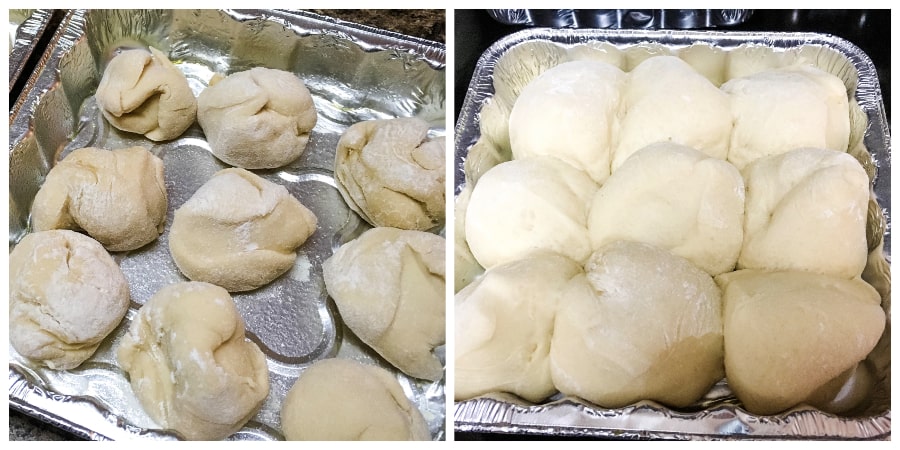
Otherwise, I most often use my 8″ round cake pans.
You could also place them in muffin tins or on a baking sheet.
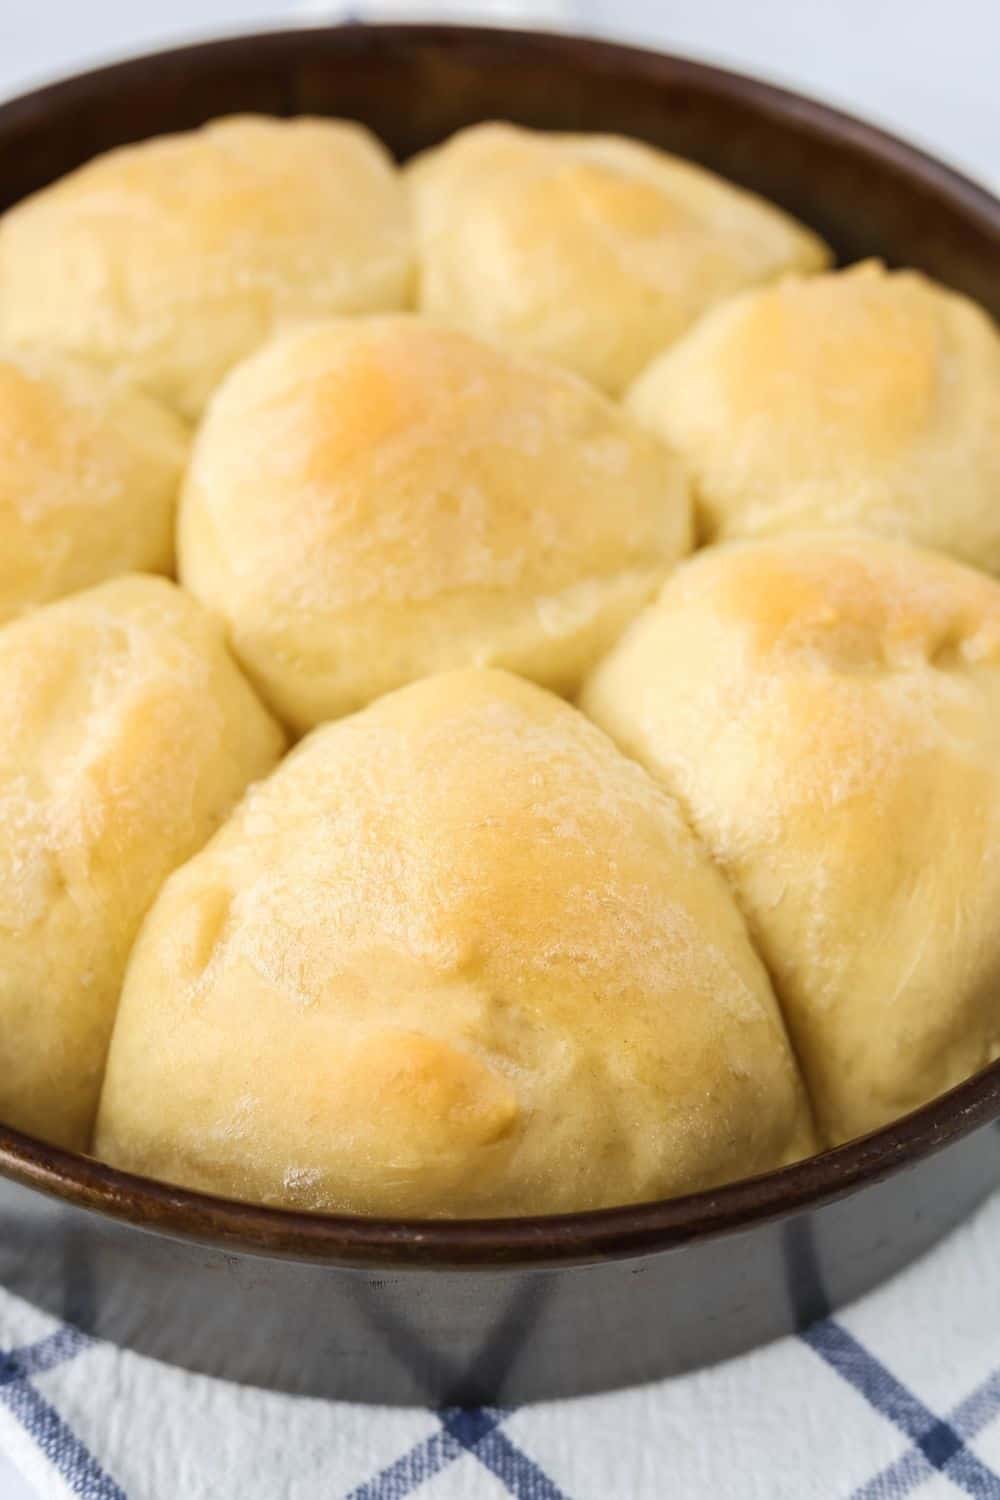
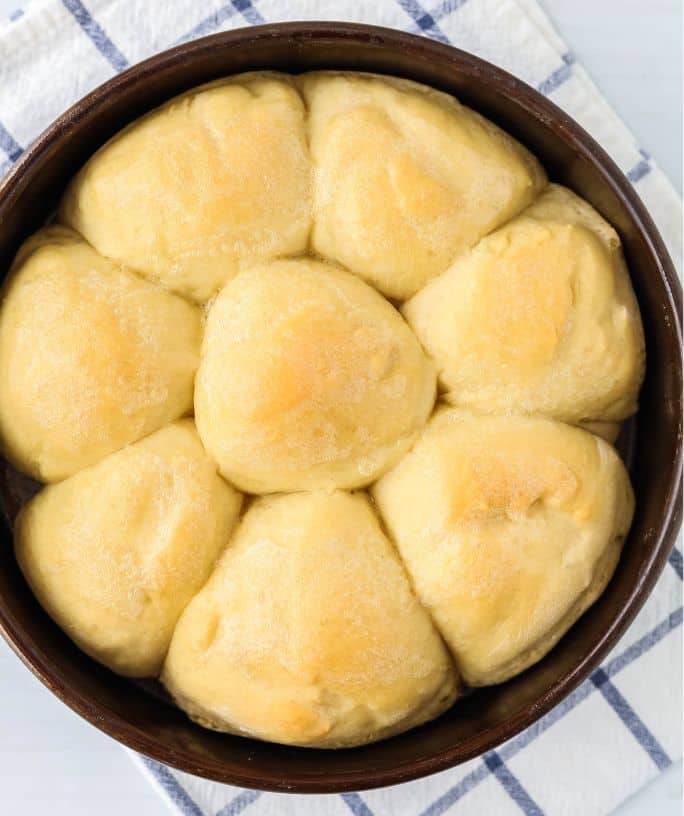
Allow these rolls to rise in the pans for another 30-45 minutes, preferably in a warmer area away from any cool drafts.
I like to put the pans into the oven and use the Warm setting for this last rise.
Again, they will roughly double in size, as you can see in the before and after photos below.
Bake. Once they’ve risen, remove the pans from the oven and preheat the oven to 375F.
After the oven is preheated, pop the pans back in and bake them until they’re golden brown on top.
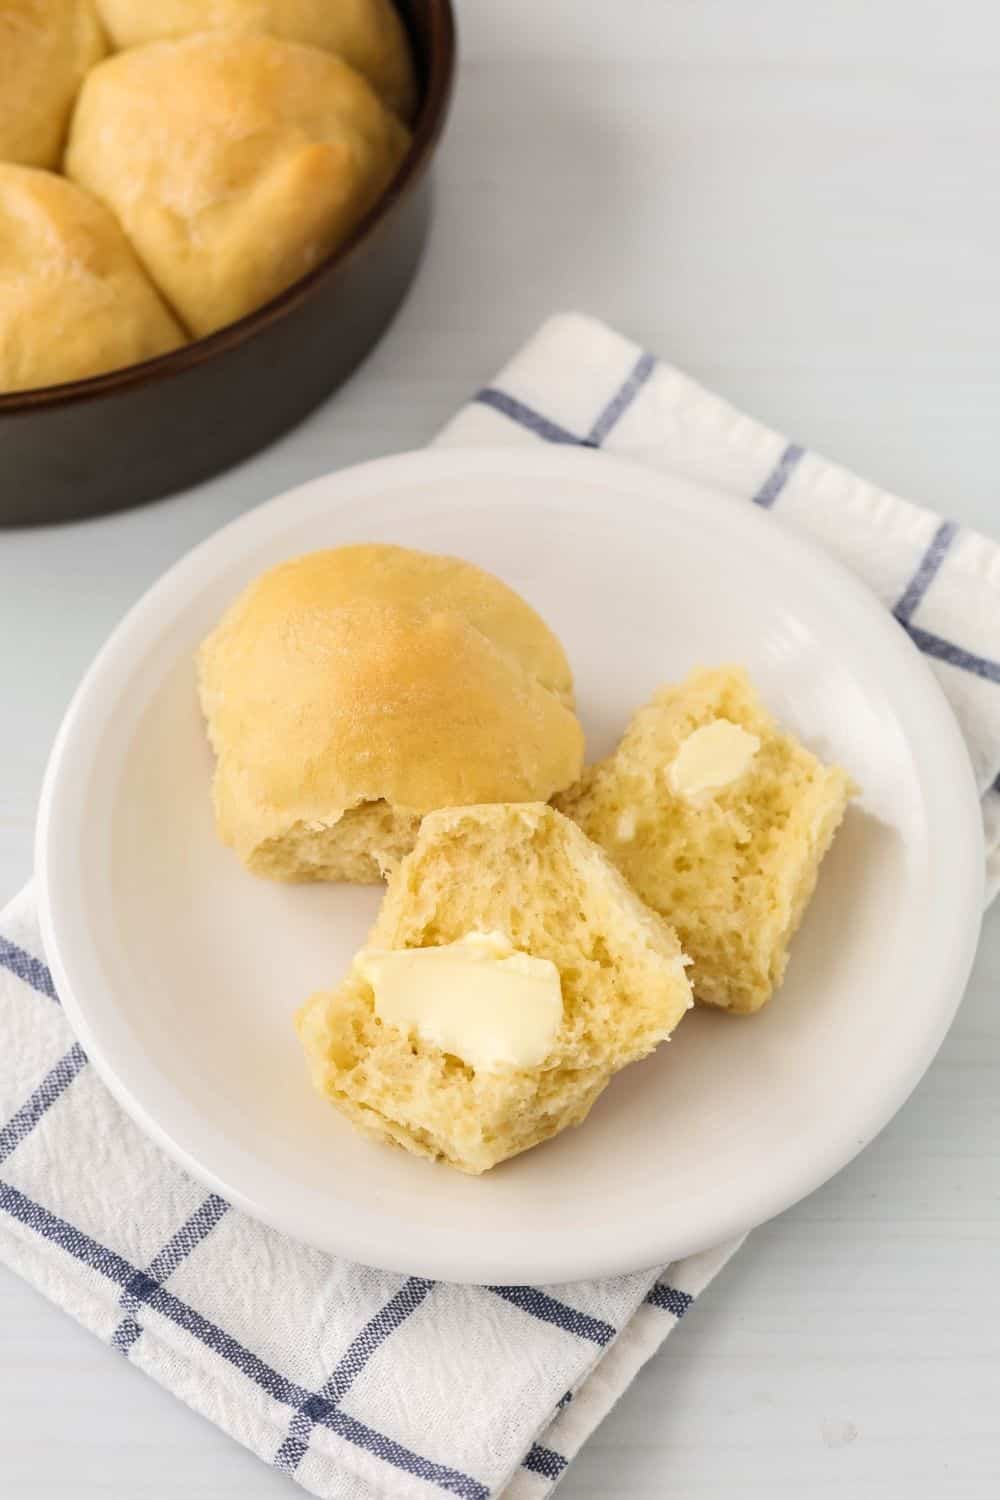
Once they’ve baked, rub the hot tops with a tablespoon or two of butter. Then, enjoy!
You can also use this method to make Instant Pot crescent rolls, if you prefer. Or for another shortcut, try these Bisquick dinner rolls.
Can I Freeze the Dough for Dinner Rolls?
Yes, these can be frozen! I’ve written a full tutorial on frozen dinner rolls that you can make ahead and freeze until baking day!
After shaping the rolls, put them on a parchment-lined cookie sheet and freeze them for about an hour or so. Then they can be stored in a large zip-top bag or other freezer storage container.
When you’re ready to use them, put them on a cookie sheet or into a baking pan.
Spray some plastic wrap with cooking spray, then loosely cover the frozen rolls with the plastic wrap (greased side down against the frozen rolls).
Let them thaw/rise for about 3-5 hours, or until they’re roughly doubled in size. Carefully remove the plastic wrap and then bake as directed in the recipe!
Homemade dinner rolls are perfect for holiday get-togethers, but they’re also just a great staple to enjoy with homemade Instant Pot soups or your favorite comfort food.
These pair beautifully with Instant Pot apple butter, Instant Pot strawberry jam, and Instant Pot peach jam, too, if I do say so myself. 🙂
More Instant Pot Side Dishes for Holiday Dinners:
- Instant Pot Cranberry Sauce
- Instant Pot Southern Style Green Beans
- Instant Pot Mashed Potatoes
- Instant Pot Cheesy Potatoes
Recommended Equipment for Instant Pot Dinner Rolls:
- Instant Pot with Yogurt function (I have the DUO60 Model, which I love)
- KitchenAid Stand Mixer with a dough hook attachment
- Cake Pans or Foil Pans
Homemade Instant Pot Dinner Rolls
Instant Pot dinner rolls are easy to make when you can proof dough in the Instant Pot! Using the Instant Pot to rise the dough yields soft and fluffy rolls!
Ingredients
- 1 cup warm water
- 1 Tablespoon active dry yeast
- 1 teaspoon salt
- 1/4 cup sugar
- 2 Tablespoons butter, softened
- 1 egg, at room temperature
- 3 1/4 cups all-purpose flour (or bread flour)
- Additional butter for spreading on top (approx 1-2 Tablespoons)
Instructions
- Pour warm water into the bowl of a stand mixer fitted with the dough hook attachment. Sprinkle yeast into the water, stirring gently. Add salt and sugar. Let stand for 3-5 minutes while the yeast begins to soften and foam.
- Add in softened butter and egg. Turn on the mixer to the Stir setting. While it is stirring, gradually add in the flour, allowing it to combine.
- Continue with the mixer on the Stir speed, allowing the mixer to knead the dough for 10 minutes. (If you don't have a stand mixer, you can mix and knead the dough by hand).
- Oil the insert pot of an Instant Pot, so there is a thin layer of oil on the bottom and sides of the inside of the insert pot.
- Transfer the ball of dough from the stand mixer to the insert pot, turning it a couple of times to coat it with oil.
- Place the lid onto the Instant Pot and use the Yogurt button (use the "normal" level for the Yogurt setting). You'll let the dough rise at this temperature for one hour.
- After an hour, punch the dough down and transfer it to a lightly floured surface.
- Divide the dough into 18 pieces of fairly uniform size and roll each piece of dough into a ball. Place 9 pieces of rolled dough into each round cake pan.
- Place the pans in a warm place to rise for another 30-45 minutes. (I put mine in the oven and use the Warm setting).
- Once the rolls have risen, preheat the oven to 375F (remove the pans first if you had them in there rising). Once the oven has preheated, bake the rolls for 12-15 minutes or until the tops are golden brown.
- Remove from oven and brush the hot tops with melted butter or just rub a stick of butter over the hot tops.
Notes
- If you prefer smaller rolls, you can divide the dough into smaller pieces.
- I most often use round cake pans or foil cake pans when baking these, but you can also use muffin pans, baking sheets, or other size pans if desired. If you use a baking sheet, place the pieces of dough approximately 2 inches apart to allow room to rise.
Did you make it and love it? I appreciate your 5-Star Rating!
I love seeing my recipes come to life "in the wild"--don't forget to tag @marginmakingmom or use #marginmakingmom on Instagram so I can see your creation!
Recommended Products
As an Amazon Associate and member of other affiliate programs, I earn from qualifying purchases.
Nutrition Information:
Yield:
18Serving Size:
1Amount Per Serving: Calories: 121Total Fat: 3gSaturated Fat: 1gTrans Fat: 0gUnsaturated Fat: 1gCholesterol: 15mgSodium: 148mgCarbohydrates: 21gFiber: 1gSugar: 3gProtein: 3g
Nutrition information is automatically calculated and is not guaranteed for accuracy.
More Homemade Bread Recipes You’ll Love:
- My Favorite Cast Iron Skillet Cornbread
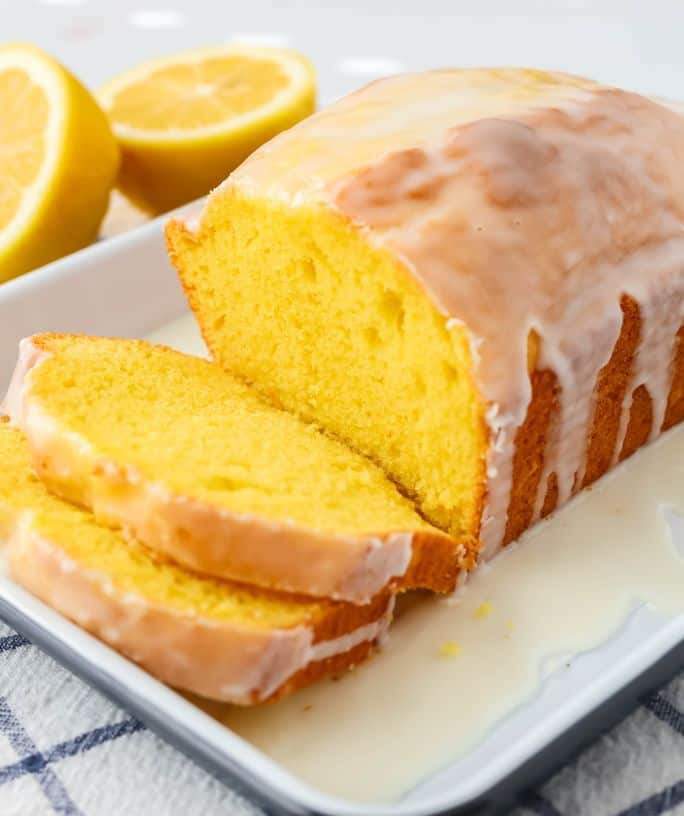
- Easy Glazed Lemon Poppy Seed Bread
- The Most Delicious Banana Bread
- Chocolate Peanut Butter Banana Bread
Be sure to save this recipe to your Instant Pot board on Pinterest!


Can this be adapted for an older Instant Pot without the yogurt setting?
Hi Jeanie! I haven’t personally tried it without the yogurt setting, so I can’t say for sure. But you could maybe try the Keep Warm setting, if your unit has that button. That setting is hotter than the Yogurt setting, so I think I’d turn on the Keep Warm setting for a few minutes to warm up the environment, then turn it off and let the residual heat rise the dough for the remaining time. If you try it, I’d love to know how it works for you! 🙂
Can this recipe be used to make cinnamon rolls?
Hi Paula! Yes, you can use this dough for cinnamon rolls (yum!). Enjoy! 🙂
Can I make them the size I need then freeze them?
Yes, you can! After shaping them, put them on a cookie sheet and freeze them for about an hour or so. Then they can be stored in a large zip-top bag or other freezer storage container. When you’re ready to use them, put them on a cookie sheet or into a baking pan, then spray some plastic wrap with cooking spray, then loosely cover the frozen rolls with the plastic wrap (greased side down against the frozen rolls). Let them thaw/rise for about 3-4 hours, or until they’re roughly doubled in size. Carefully remove the plastic wrap and then bake! Enjoy! 🙂
Hi. What level of yogurt setting on the IP? There is low, medium and high.
I use it at the “normal” (or medium) setting. I’ll add that to the instructions to be more specific–thanks for asking! 🙂
Hi! I’ve returned to your recipe when others have not met my standards. I double your recipe in order for my dough hook to have enough ingredients to grab hold and knead. I’ve tried recipes that are very similar but include milk, but I prefer yours. The aroma and taste are fantastic!
Thank you 🙂
Thanks so much, Mary! I’m so happy to hear that this has become a favorite for your family, just as it is for ours! 🙂
Do you turn the warm on for the oven while the rolls are in there proofing the second time? I’m new to this and want to try this ag thanksgiving. Thanks
Hi Stephanie! For the second rise, you can really put them anywhere that’s fairly warm. So to answer your question, yes, you can turn the oven to Warm when you put them in for the second rise. If your oven doesn’t have a “Warm” setting, you can just set your oven temp to the lowest it will go…usually around 170F-200F for most ovens. The rolls will rise in there, then when it’s time to bake them, I’ll carefully remove them from the oven and set them on the counter while the oven preheats to 375F for baking (it usually preheats quickly since it’s already warm in there), then pop them back in the oven to bake. You could also leave them in the oven while it preheats to baking temp, but you may need to add a minute or two to the bake time in that case. I hope that makes sense–let me know if you have other questions! 🙂
Can you make these a day ahead and bake them right before you want to eat them? If yes, should you store them in the fridge?
Hi Cindy! Usually when I make these ahead of time, I freeze the rolls (using this method: https://marginmakingmom.com/frozen-dinner-rolls/). However, it should work fine to refrigerate the dough overnight. To do that, I’d suggest following the recipe up through the part where you shape the rolls and put them in the pans. Spray plastic wrap with cooking spray and cover the rolls with that. Refrigerate them in the pans to keep them from rising too much overnight. Then, on baking day, remove them from the fridge, remove the wrap, and let them sit at room temperature for about 1 to 1.5 hours to finish rising. Then, they should be ready to bake. Enjoy! 🙂
Can you let them rise the second time for more than 45 minutes? If possible, I would like to make them more than 2 hours before dinner.
Hi Brenda! Unfortunately, you can’t let the fresh dough rise much longer than 45 minutes for the second rise, otherwise they will end up rising too much and then deflating. If you want to make them farther in advance, I’d suggest freezing the balls of dough, that way the second rise can last longer. I have instructions here for doing that: https://marginmakingmom.com/frozen-dinner-rolls/ Enjoy! 🙂
Wow, this recipe is very very delicious and I want to keep trying it every day.I made this recipe for my family and they enjoyed it a lot, My grandma requested me to make this for her again.
Thank you! I’m so happy to hear everyone enjoyed these rolls!
I made these this morning and I was real excited when the rose as much as this did in the instant pot, when I toke them out of pot the dough had deflated. I cut my dough into 18 pieces as the recipe said I set my oven to warm and once in the oven they seemed to rise but not a lot. Once I toke them out to back them they went flat. After baking they were flat and hard. I have been trying to make rolls for years and nothing. Can you help me with what I might have done wrong. Thank you
Hi Cyndi! I’m so sorry to hear this–I know how frustrating it is when something doesn’t turn out as expected. It sounds like your dough likely rose too much prior to baking (this is known as over-proofing). When this happens, the air bubbles in the dough made by yeast will end up collapsing, and your rolls will be flat instead of fluffy. There are so many variables that affect rising time, such as temperature, humidity, etc. You want the dough to roughly double in size during the first rise (in the Instant Pot). Then you will punch the dough down (basically deflating it), shape into rolls and put them in the pan to rise again in a warm spot until they’re nice and puffy. Then go ahead and bake them. To avoid handling the pans too much (and risking the dough collapsing), you might try letting the pans of rolls rise in the warm oven, then once you’re ready to bake them, just leave them in the oven and turn the oven on. I’ve done this successfully many times (so they essentially start baking while the oven is preheating). I hope that helps! Don’t give up–it sounds like you were on the right track and the dough just got a little too active during the rise time! 🙂
Why is my dough so sticky?!
Hi Brenda! There are a few different reasons why the dough could be sticky–it could be the way the flour was measured, the humidity in your area, etc. It’s okay if the dough is a little sticky, but if after rising the dough is too sticky to handle, you can dust the dough (and your hands) well with flour until it’s easier to work with, or spray your hands with cooking spray to keep the dough from sticking. I hope that helps! 🙂
Best dinner rolls I have ever made! Will be using this recipe to make hamburger and hotdog buns as well. Well done and thank you for sharing!
Thank you, Lynn! I’m so glad you enjoyed them as much as we do! 🙂